How to Add a Cluster on GlobalAI
Create a cluster is a fundamental step in setting up your infrastructure on GlobalAI. A cluster is a collection of nodes that run containerized applications managed by Kubernetes. Follow the steps below to create a new cluster on GlobalAI.
Prerequisites
Before creating a cluster, ensure you have the following:
- An active GlobalAI account with the necessary permissions to create clusters.
- A previously configured Kubernetes cluster that you want to add to GlobalAI.
Create a cluster
To create a new cluster, follow these steps:
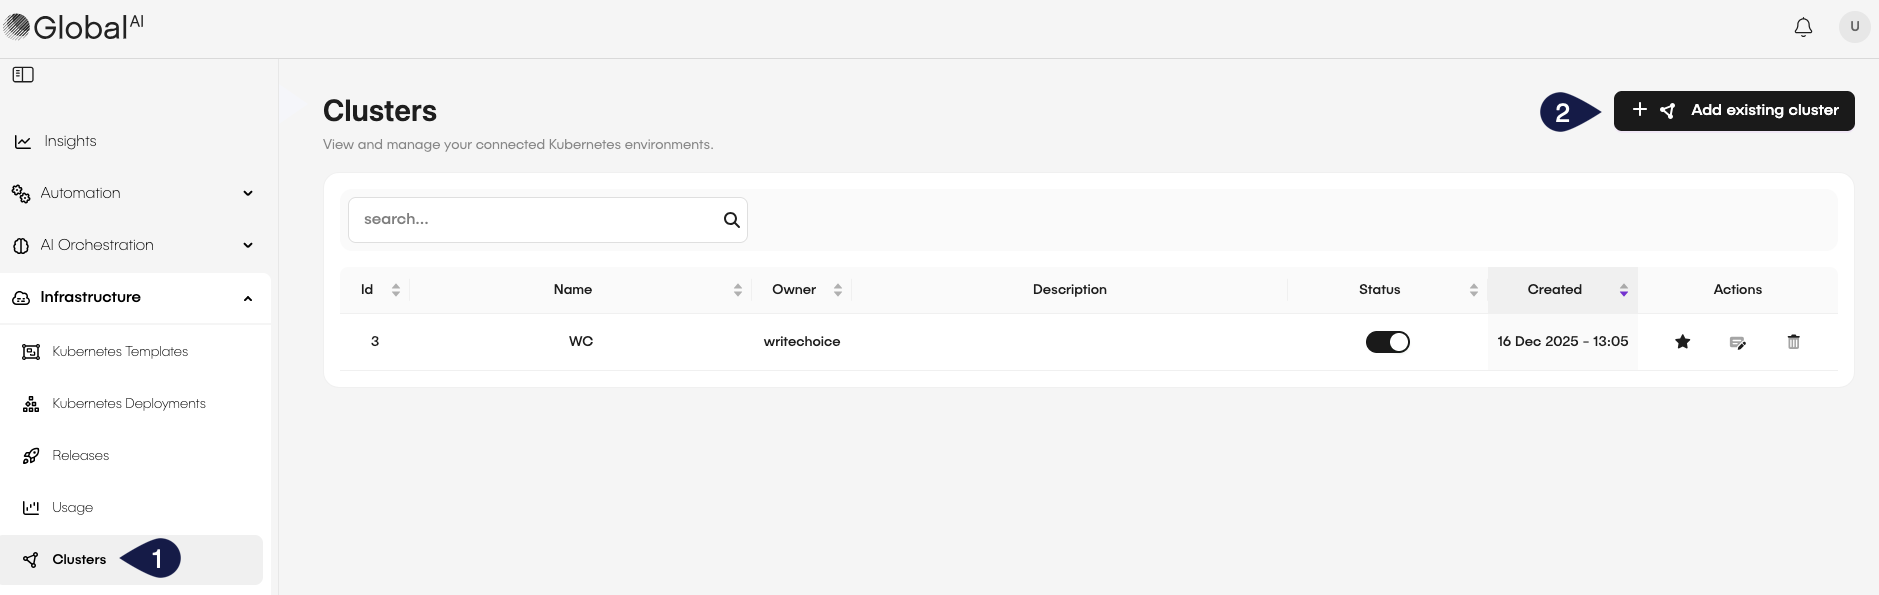
- On the GlobalAI dashboard, access the Clusters section on the sidebar.
- Click on the Add existing cluster button.
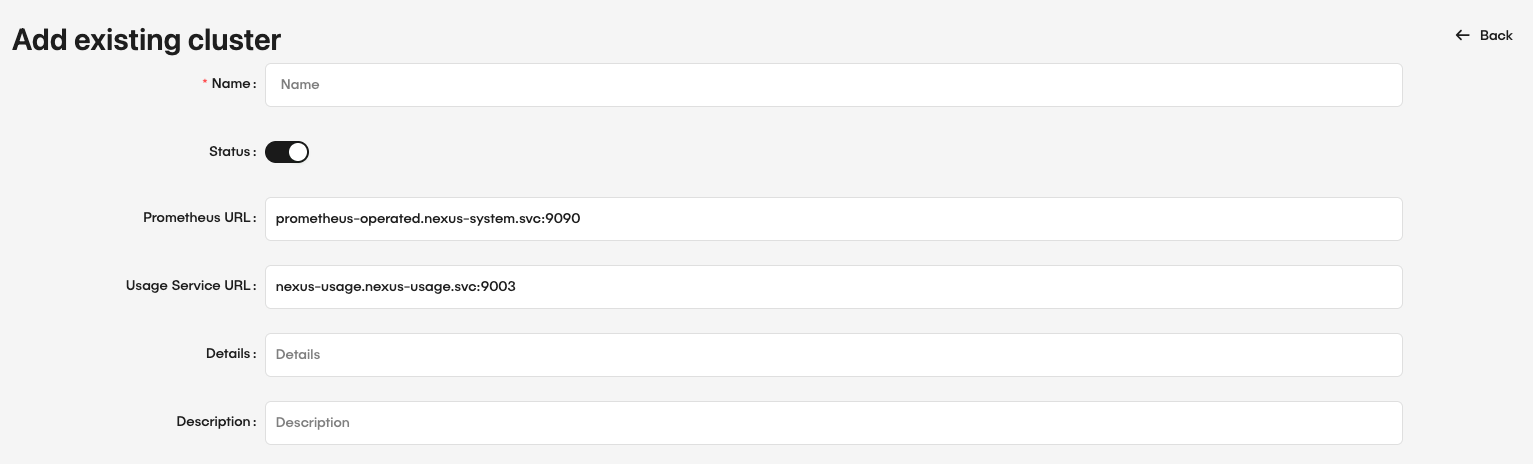
- On the Add Existing Cluster page, fill in the required details:
- Name: Provide a unique name for the cluster.
- Status: Toggle the button to set the cluster as active or inactive.
- Prometheus URL: Provide the URL for Prometheus monitoring if applicable.
- Usage Service URL: Provide the URL for the usage service if applicable.
- Details: Add details about the cluster, such as its purpose or configuration.
Configure the cluster connection
Before you can use the cluster, you need to configure the connection settings. To do this, you have option: Cluster Config or AKS Config.
To use the Cluster Config option, follow these steps:
- On the Cluster Config tab, you will need to add the Kubernetes configuration file (
kubeconfig) to connect the cluster to GlobalAI. You can either:- Upload file: Click on the upload area to upload your kubeconfig file.
- Paste content: Paste the content of your file inside the Cluster Config textfield.
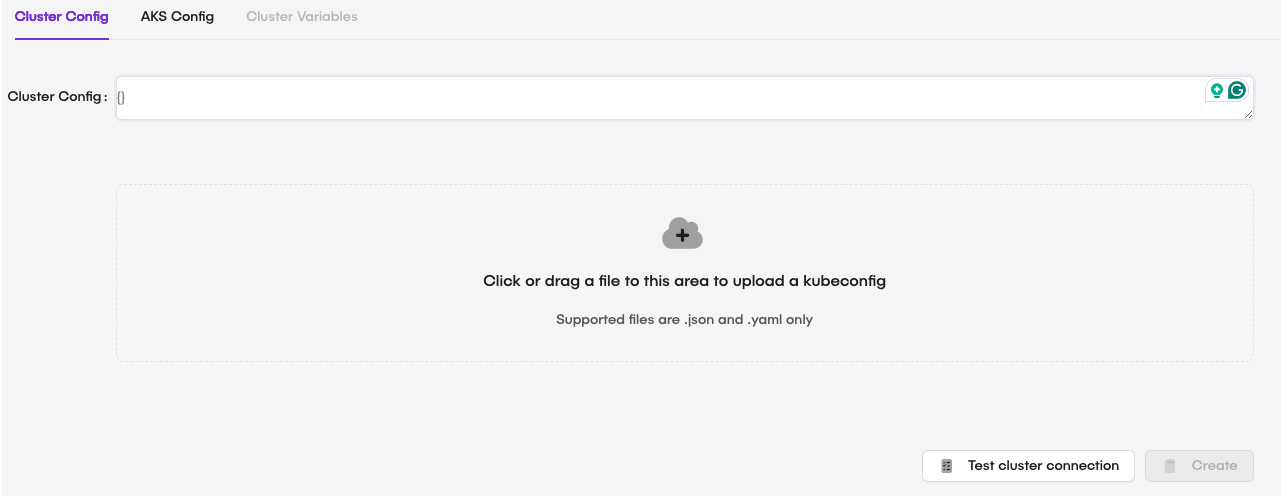
- After filling in all the details and verifying the connection, click Create to add the new cluster to GlobalAI.
To use the** AKS Config** option, follow these steps:
- On the AKS Config tab, you will need to fill the required details to connect an Azure Kubernetes Service (AKS) cluster to GlobalAI:
- AKS Name: Provide the name of the AKS cluster.
- Client ID: Provide the Client ID for the AKS cluster.
- Client Secret: Provide the Client Secret for the AKS cluster.
- Tenant ID: Provide the Tenant ID for the AKS cluster.
- Subscription ID: Provide the Subscription ID for the AKS cluster.
- Resource Group: Provide the Resource Group for the AKS cluster.
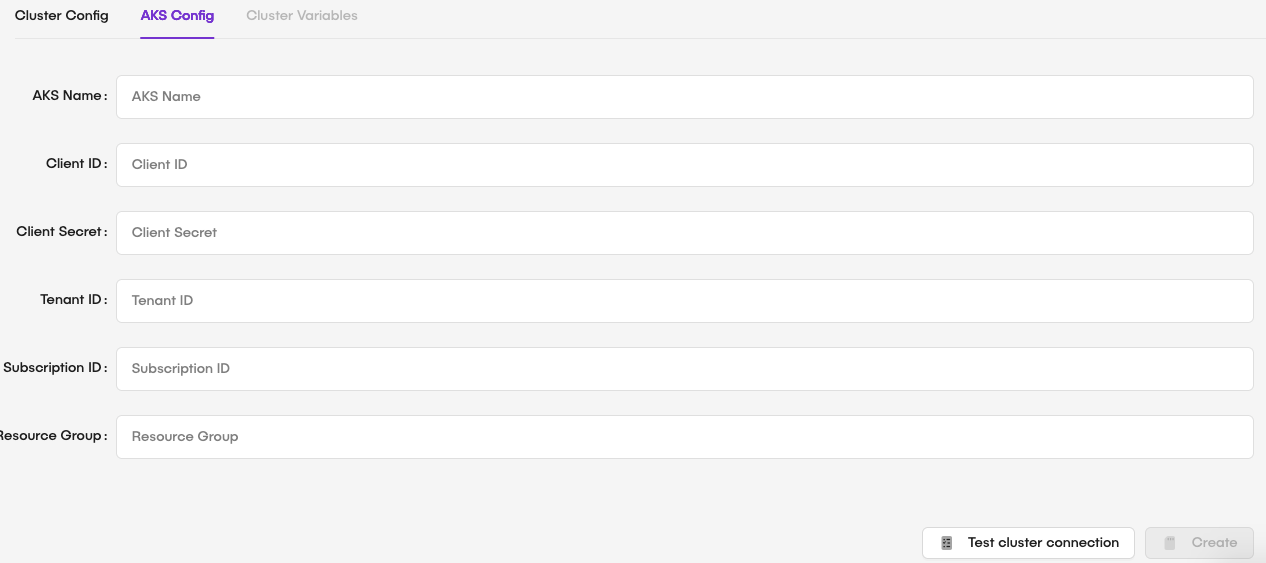
- After filling in all the details, click Create to add the new cluster to GlobalAI.
It is recommended to click the Test cluster connection button to verify that the provided kubeconfig file is valid and that GlobalAI can connect to the cluster before saving.
Manage clusters
After your cluster is created, you can manage it from the Clusters page. Here, you can view the list of clusters, edit their details, or delete them as needed.

Edit a cluster
To edit an existing cluster, follow these steps:
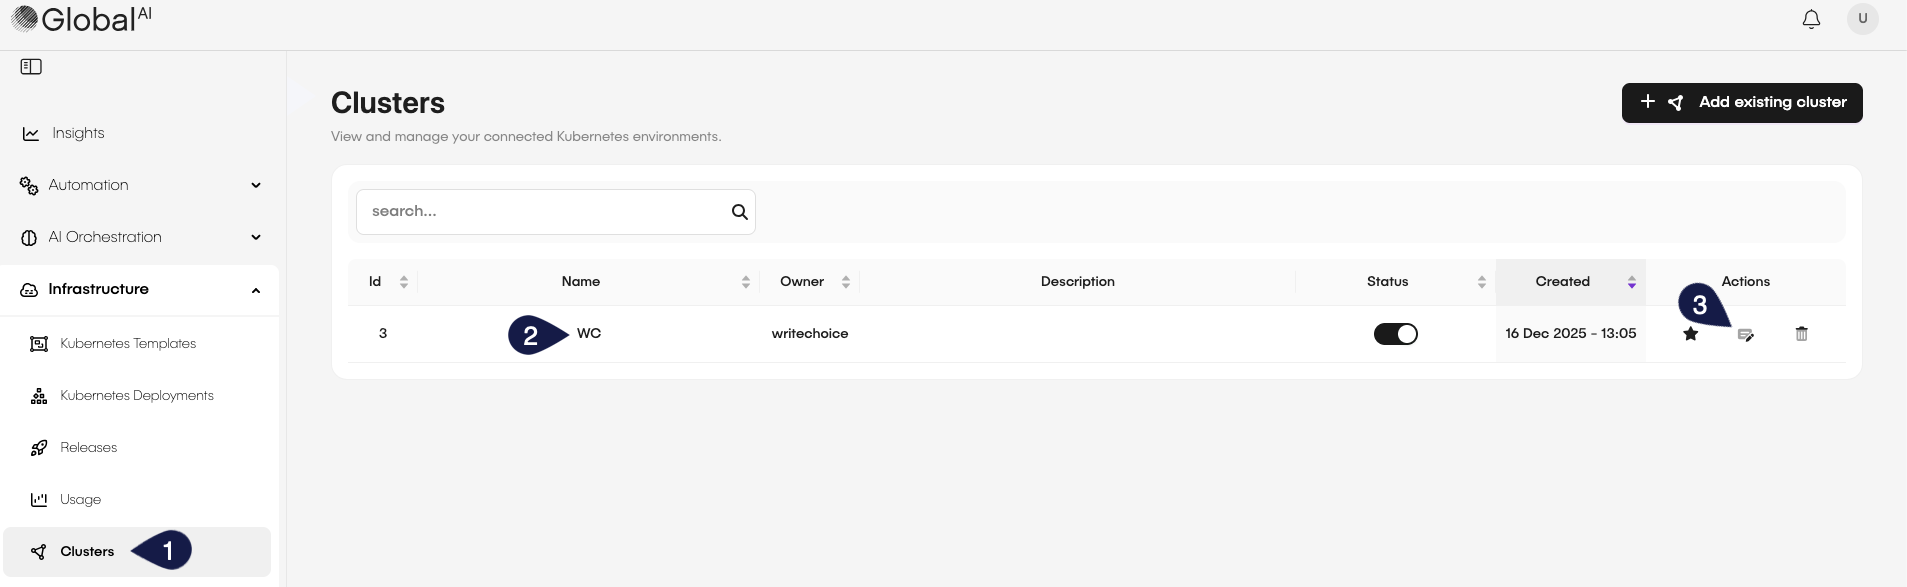
- On the GlobalAI dashboard, access the Clusters section on the sidebar.
- Locate the cluster you want to edit from the list.
- Click on the Edit button next to the cluster.
Delete a cluster
To delete a cluster, follow these steps:
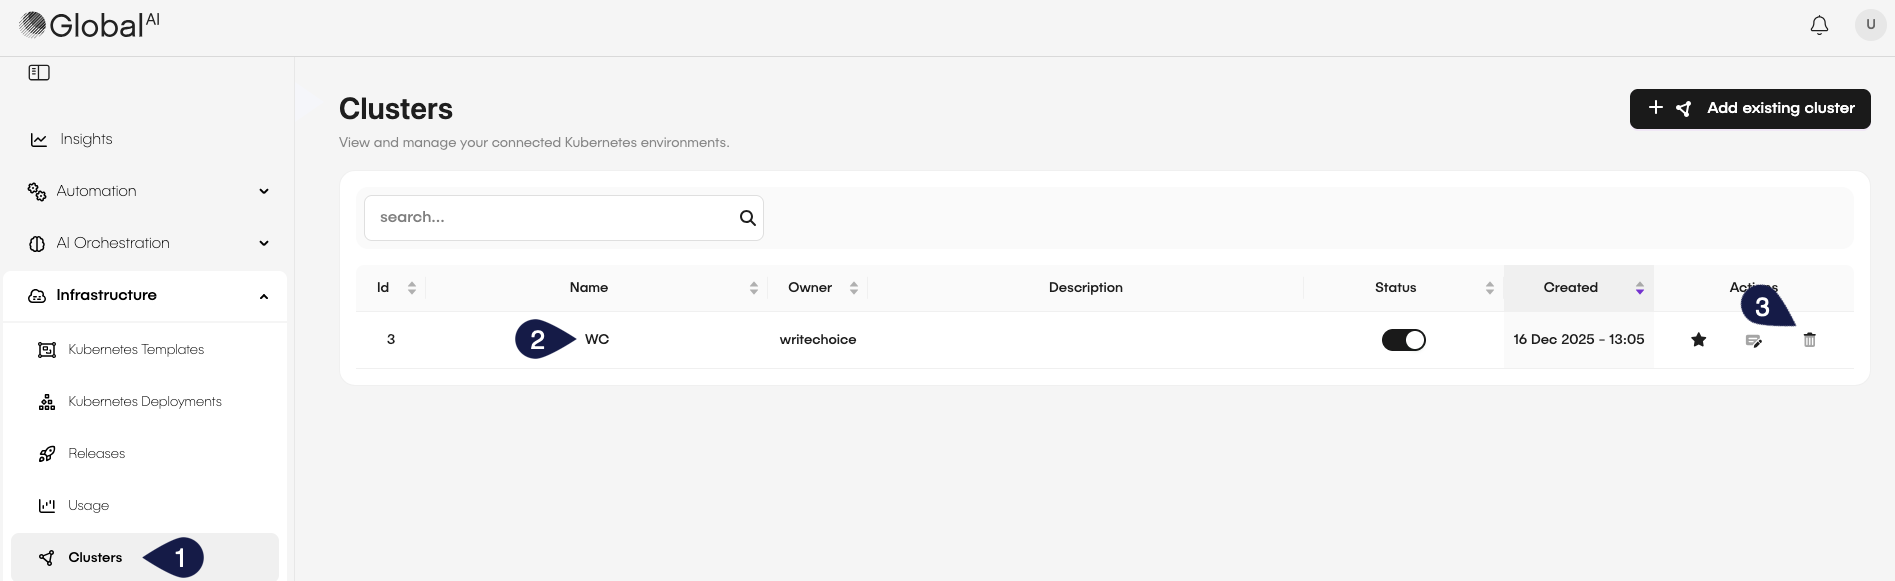
- On the GlobalAI dashboard, access the Clusters section on the sidebar.
- Locate the cluster you want to delete from the list.
- Click on the Delete button next to the cluster.
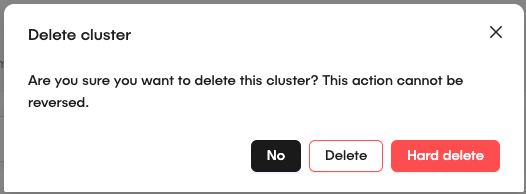
- On the confirmation modal, you will have three options:
- No: Click this button to cancel the deletion process.
- Delete: Click this button to delete the cluster without deleting associated resources.
- Hard delete: Click this button to delete the cluster along with all associated resources.
Related articles
Now that you know how to create a cluster on GlobalAI, you might want to learn more about:
How to Deploy and Manage Applications
Learn how to deploy and manage applications on your Kubernetes clusters using GlobalAI.
How to Manage Cluster Groups and Deployment Rules
Learn how to organize your clusters into groups and set deployment rules on GlobalAI.
How to Create Kubernetes Templates
Learn how to create and manage Kubernetes templates for consistent application deployments on GlobalAI.