How to Set Up an Approver Step
The Approver Step node adds a "human-in-the-loop" to your automation. This node pauses the workflow execution and waits for a user to manually approve or reject the step before continuing. This is useful for processes that require manual sign-off or review.
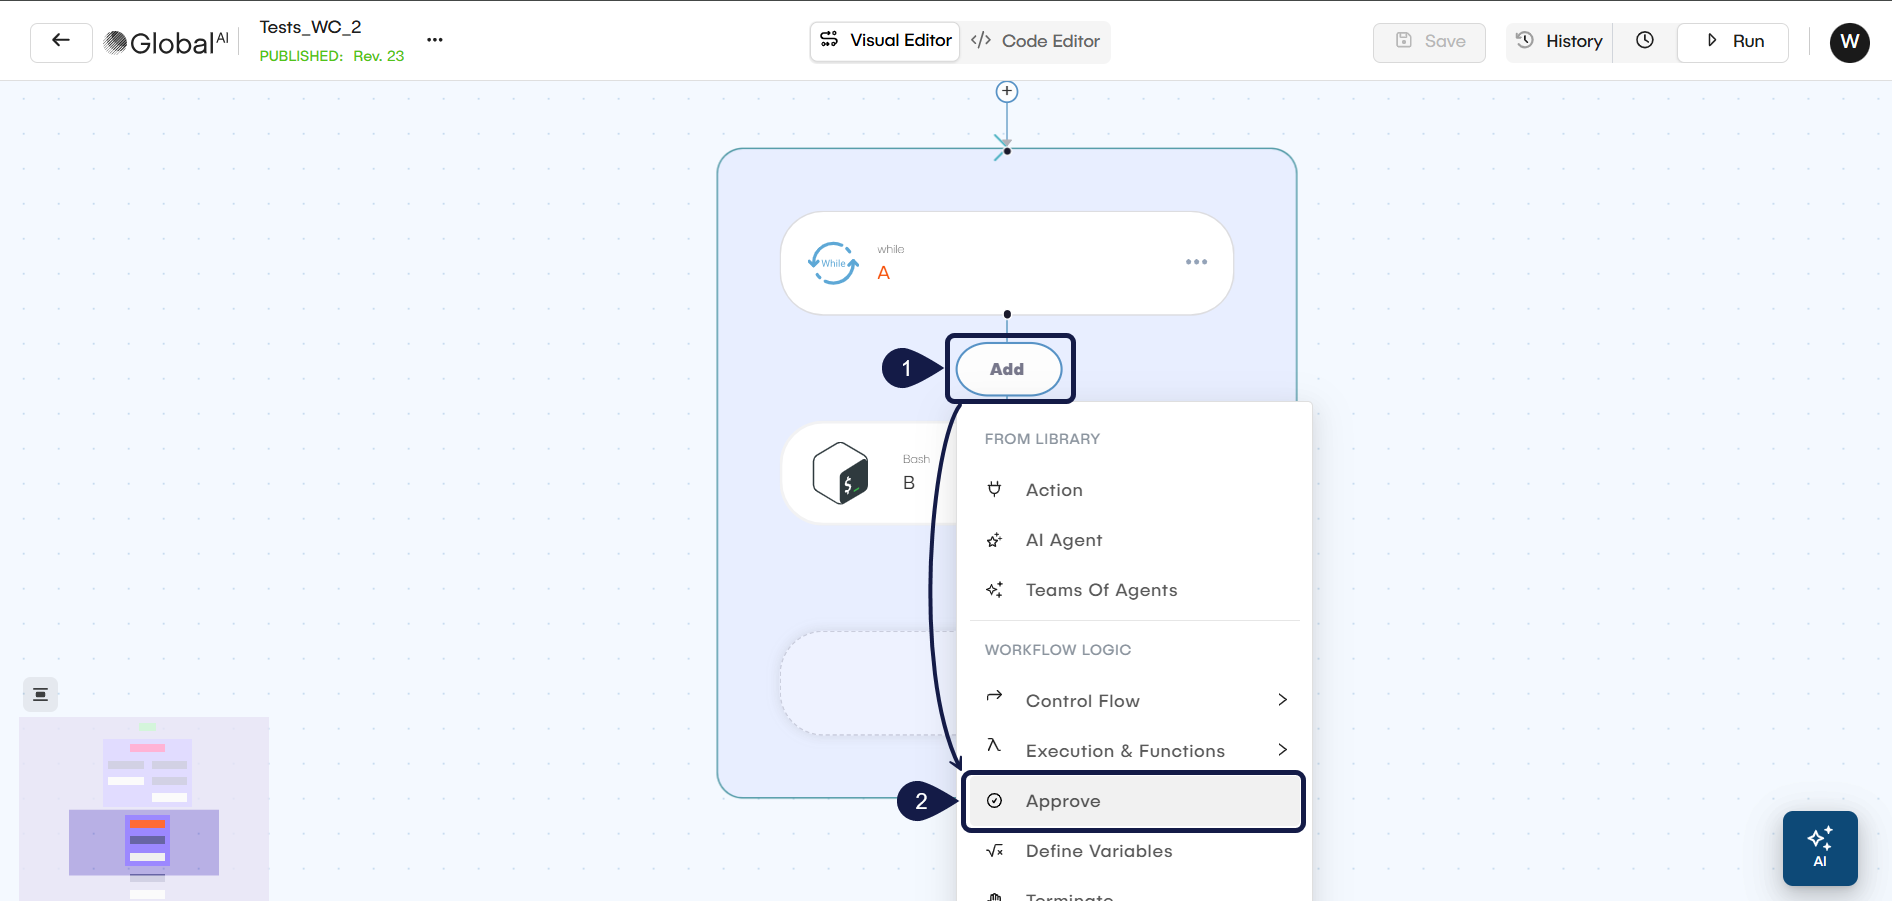
Add the Approver Step
You can add the approver node anywhere in your workflow from the editor.
- In the visual editor, click the + Add icon to add a new node.
- Select Approver Step from the node menu. Its configuration form opens automatically.
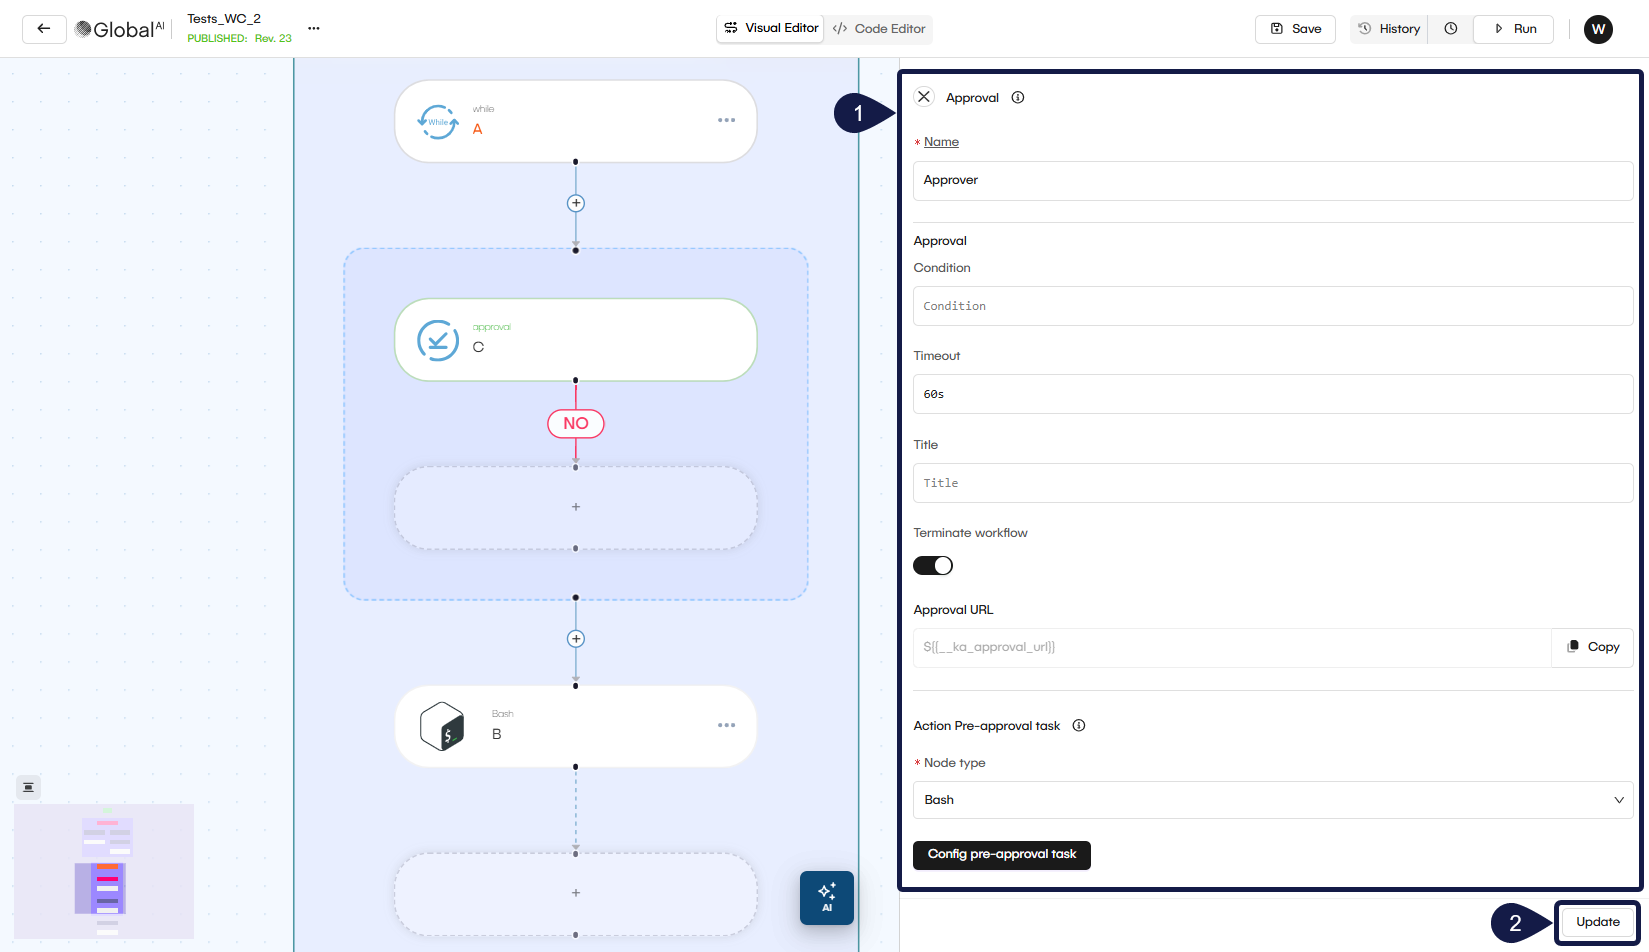
Configure the Approver Step
Within theform that opens, you can set up the approval's node behavior.
- Configure the following fields:
- Node Name: A unique name for this node in the workflow (e.g.,
Approve PO). This name is used to access its output in later steps - Condition: (Optional) An expression to control if this node runs. If the expression is false, the node is skipped If it has a parsing error, the workflow stops.
- Title: A custom title for the approval page. This title is visible to the user when they open the approval URL (e.g., "Payment Approval").
- Timeout in seconds: This is the most important setting. Enter the total number of seconds the workflow will wait for a manual response (e.g.,
3600for one hour). If no one responds before the timeout ends, the step is automatically considered a rejection. - Nodes (Notification Step): The Approver Step generates a temporary, unique web page where a user can click "Approve" or "Reject". You must add a node inside this section to send the approval URL to the user. This is often an HTTP Request node to send a Slack message or an email.
- On Rejection Path: Add nodes to this section to define what happens if the step is rejected or times out. You can use this path to send a notification that the item was rejected.
- Continue execution on rejection: This checkbox controls what happens after the On Rejection path runs.
- Unchecked (default): The entire workflow terminates after the rejection steps are complete.
- Checked: The workflow will continue to the next main step after the rejection steps run.
- Click Update to save the configured node.
If you need to change the configuration later, select the Approver Step node in the editor to open its form again.
Related articles
Now that you know how to use an Approver Step, you can explore other ways to manage your workflow's logic and data.
Add a Control Flow Node
Learn how to use the 'when' condition to control if a node should run based on variables or previous outputs.
Define and Use Variables
See how to set variables and access data from previous nodes to make your workflows dynamic.
Create Reusable Modules
Discover how to build reusable components for your automations.