How to Configure an Automation Rule
Automation Rules are the triggers that start your workflows based on specific events. For example, you can use a rule to start a workflow every time a new row is added to a database table.
Setting up an Automation Rule is a two-part process:
- Define a Data Source: This is the service or system that the rule will "listen" to for events.
- Create a Trigger: This connects your source to a specific workflow and tells it when to run.
1. Define a data Source
The first step is to create the source that will send events. This source listens for activity in your applications, databases, or message queues.
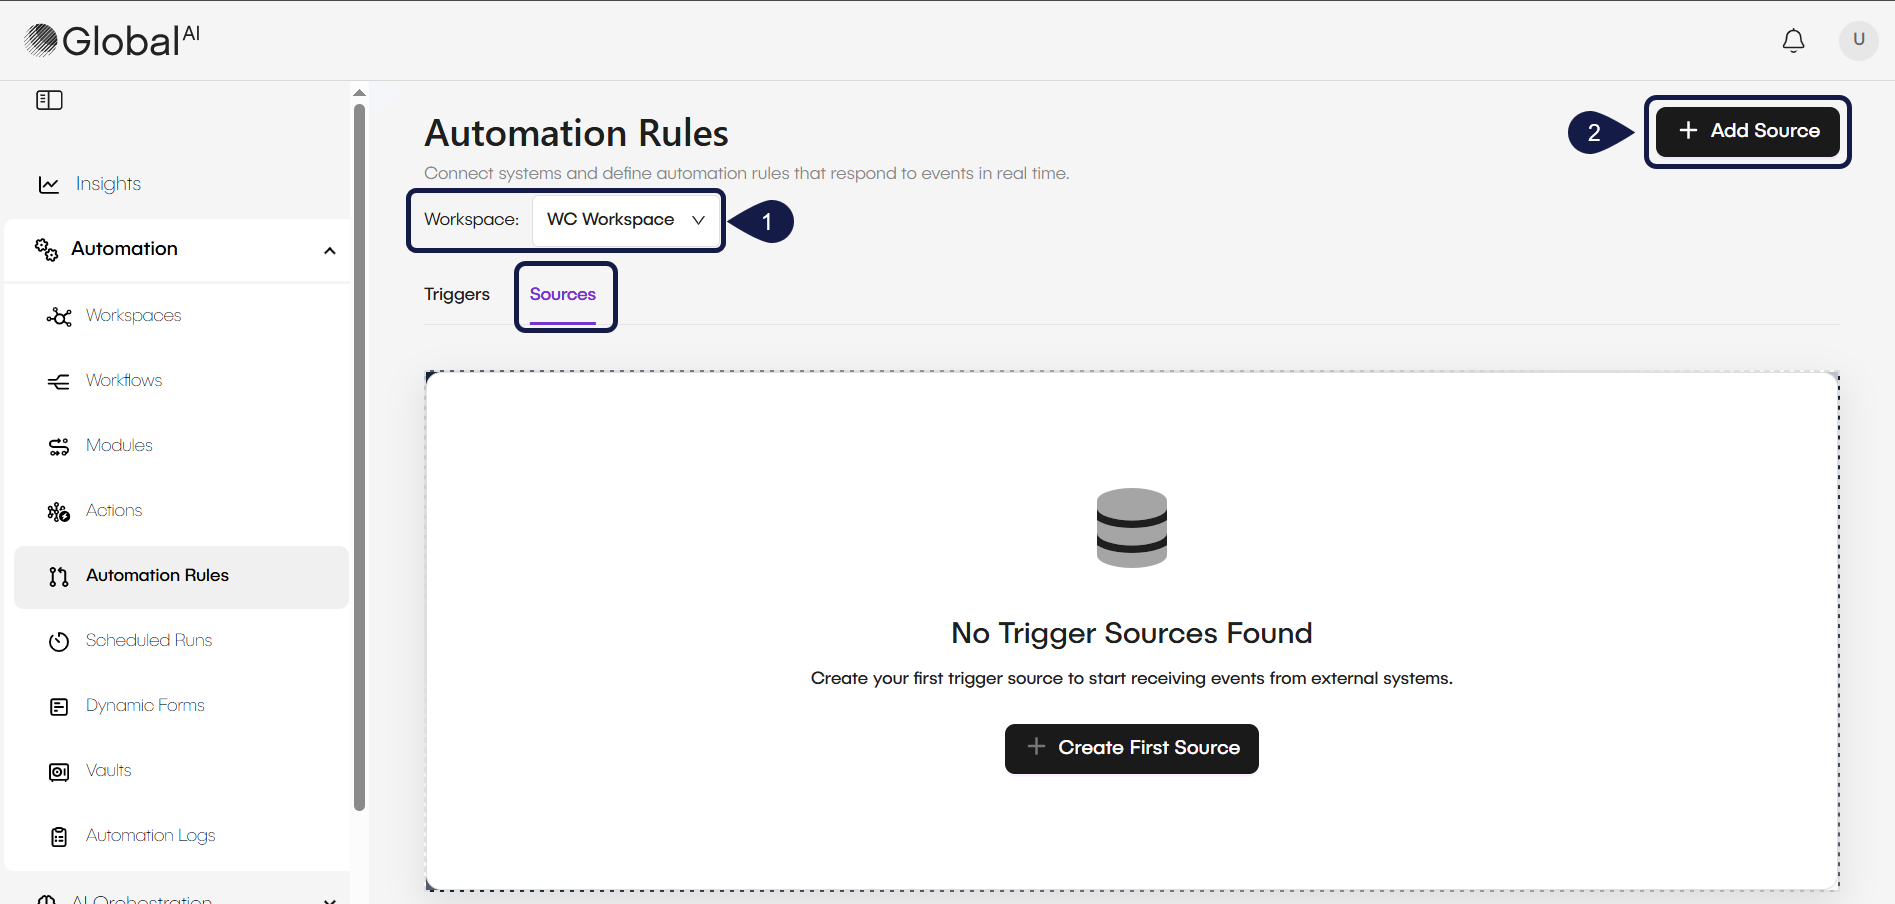
- Access Automation Rules and select the corresponding Workspace.
- Select the Sources tab and click on +Add Source.
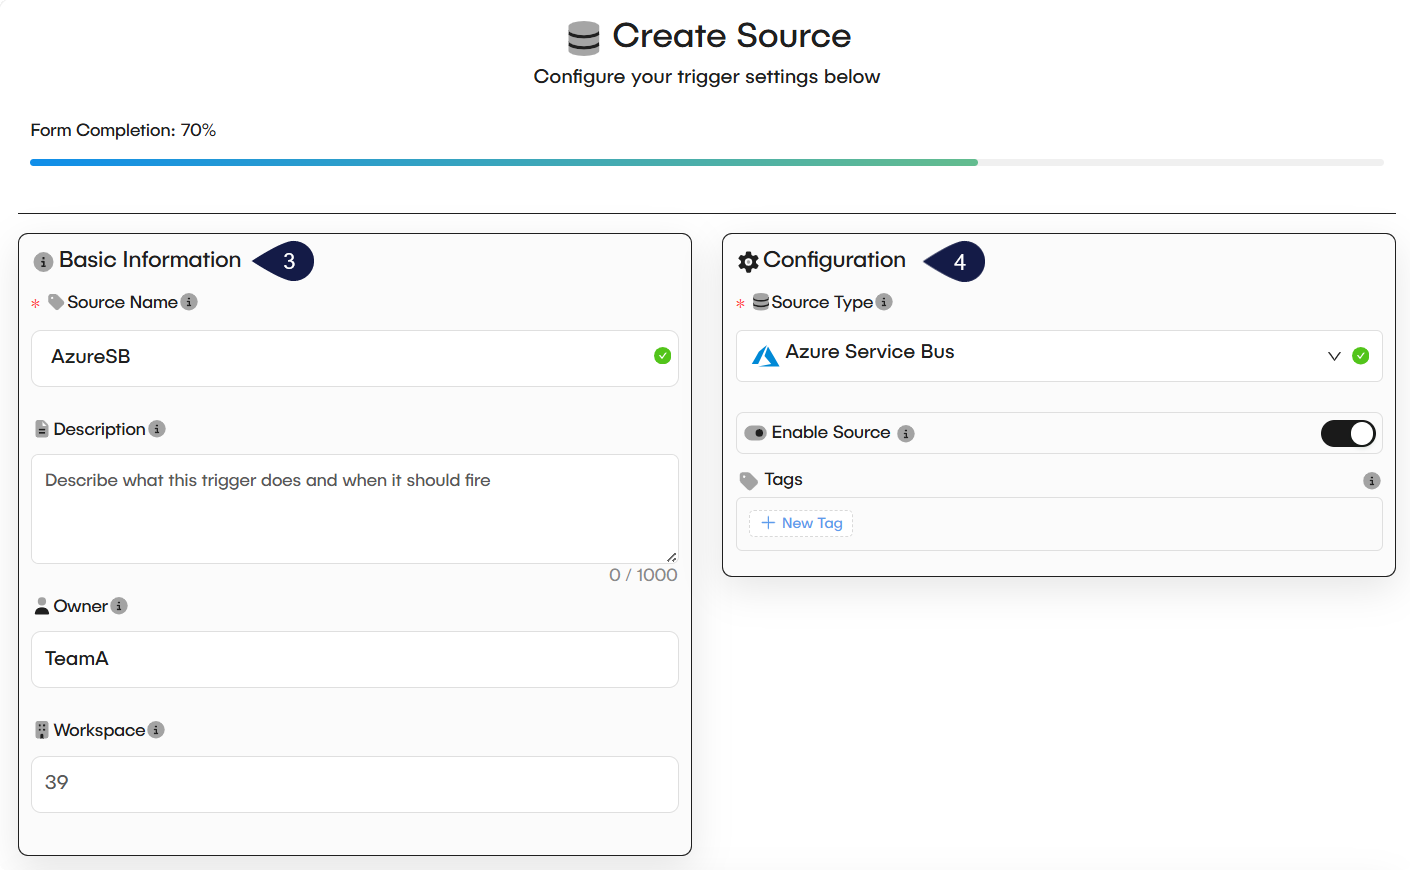
- Fill in the Basic Information fields:
- Source Name: A unique name for your source.
- Description: (Optional) A brief explanation of what this source does.
- Owner: This field identifies the owner.
- Workspace: This field shows the workspace ID.
- Complete the main Configuration section:
- Source Type: Select the service you want to listen to from the dropdown menu. This is the most important step, as it determines the fields in the next section.
- Enable Source: Set this toggle to "on" to make the source active after you save it.
- Tags: (Optional) Add tags to help organize your sources.
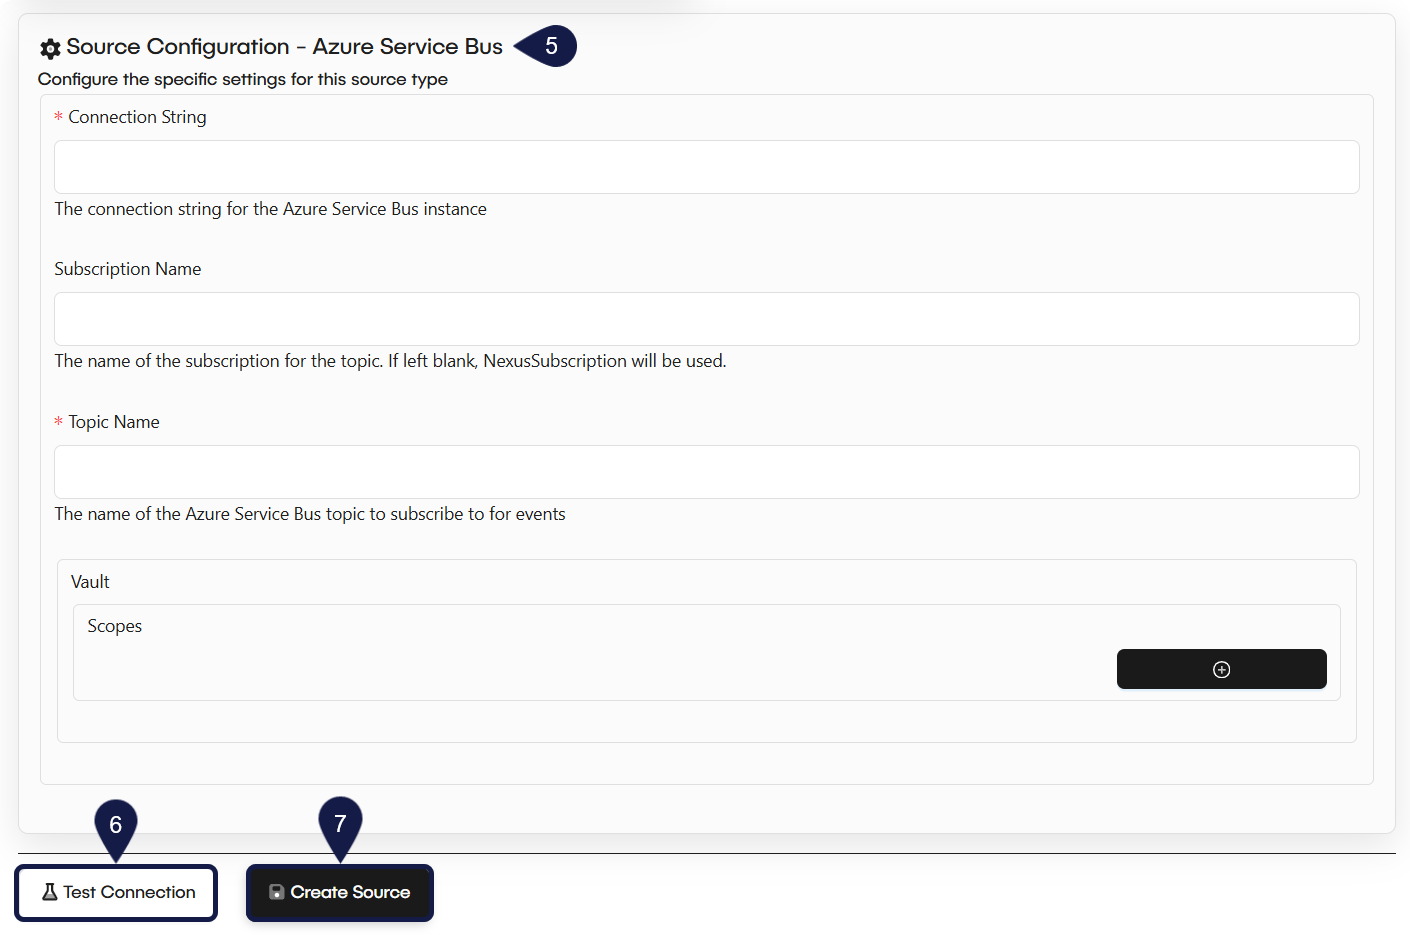
- Move to the Source Configuration section. The fields here change based on the Source Type you selected.
- If you chose Azure Service Bus, you will see fields for:
- Connection String
- Subscription Name
- Topic Name
- Vault
- Scopes
- If you chose Azure Service Bus, you will see fields for:
- (Recommended) Select Test Connection. This will check if the GlobalAI platform can successfully communicate with your source using the details you provided.
- Select Create Source to save your configuration.
2. Create a Trigger
After your source is saved, you can create the trigger. The trigger connects the source event to the workflow you want to run. You can create a trigger directly from the Workflow Editor as a shortcut.
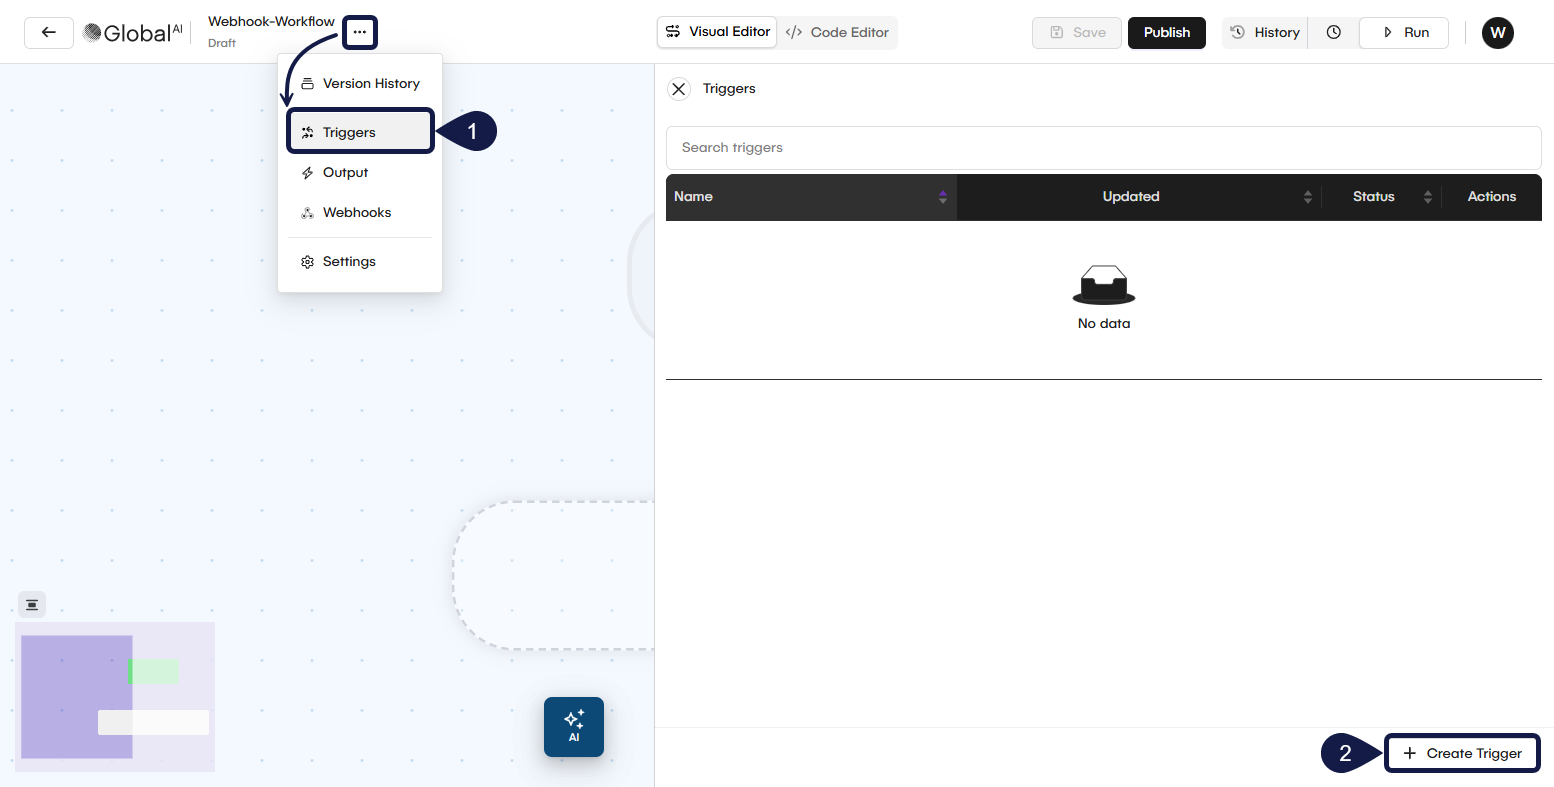
- Open the workflow you want to add a trigger to. In the Workflow Editor, expand the contextual menu and select Triggers.
- The Triggers page shows any triggers already connected to this workflow. Select Create trigger to open the configuration form.
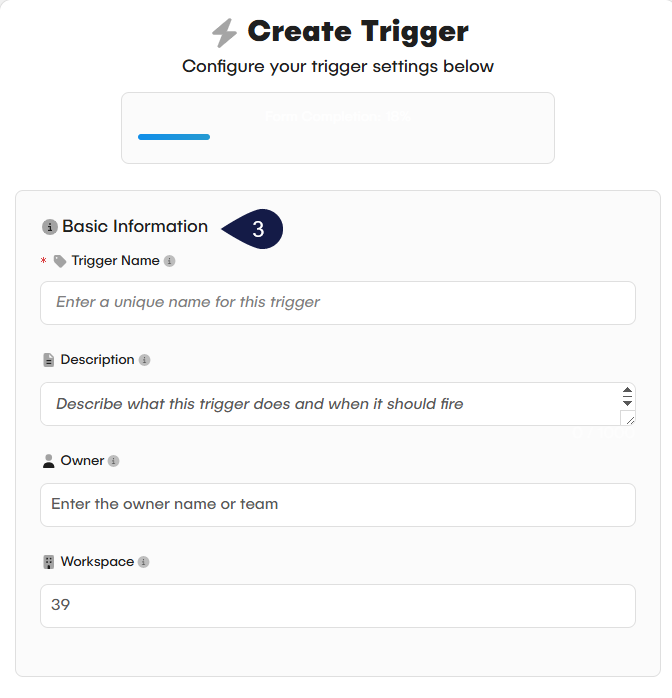
- Fill in the Basic Information fields:
- Trigger Name: A unique name for your trigger.
- Description: (Optional) A brief explanation.
- Owner and Workspace ID: These fields identify the owner and workspace.
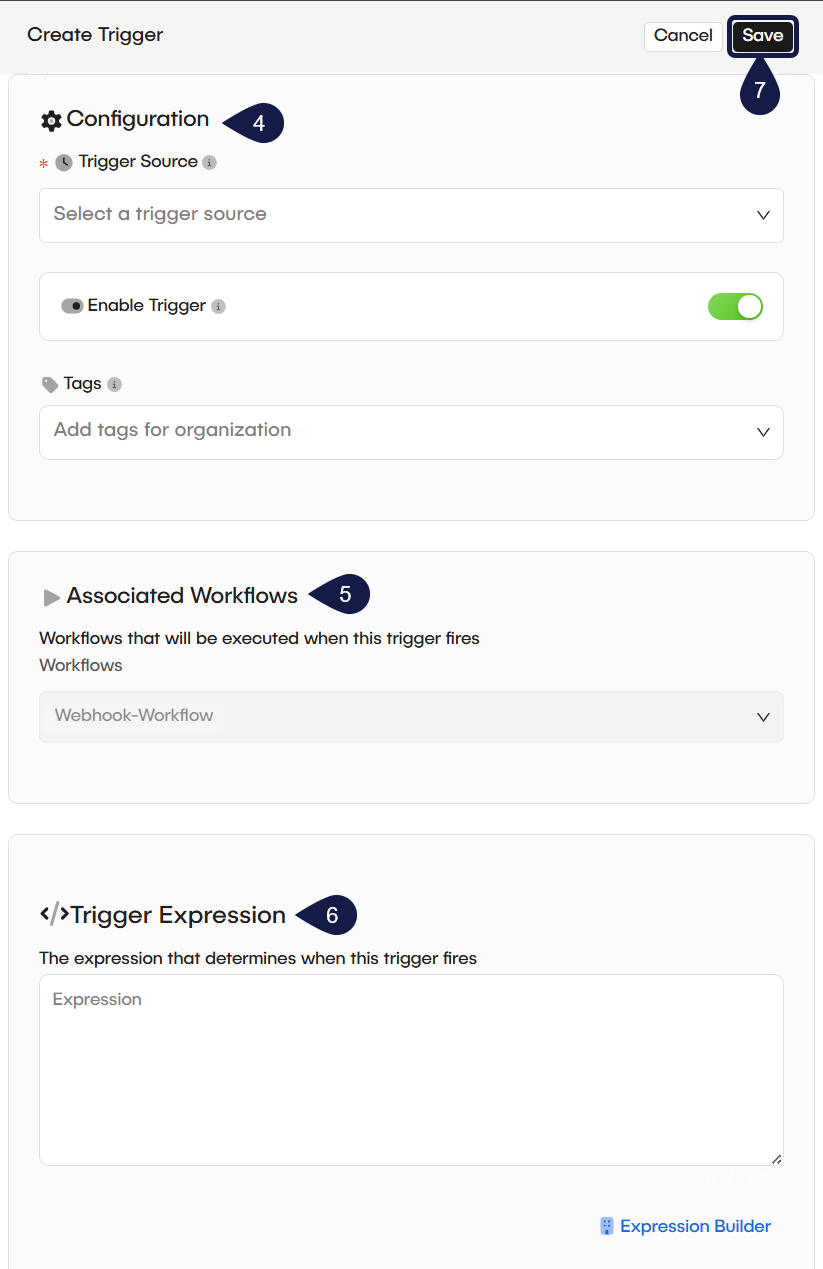
- Complete the Configuration section:
- Trigger Source: Select the data source you defined in Part 1. This is the source the trigger will listen to.
- Enable Trigger: Set this toggle to "on" to make the trigger active after you save it.
- Tags: (Optional) Add tags to help organize your triggers.
- Review the Associated workflows section. Because you are creating this trigger from the editor, your current workflow is automatically selected and cannot be changed.
- (Optional) Define the Trigger expression. This field acts as a filter. It uses an expression to decide if the trigger should fire, even when the source sends an event. You can use the Expression Builder to help find predefined events and create your expression.
- Select Save to create your trigger. Your Automation Rule is now active. When your source generates an event that matches your trigger's expression, it will automatically start your selected workflow.
Related articles
Now that you have configured a rule, you can learn more about building the workflows it will trigger.
Use an AI Agent in a Workflow
A step-by-step guide to configuring and adding an AI Agent node to your automation workflow.
Workflows
This is the visual canvas where you design and execute your automation. A Workflow has several statuses, such as `draft`, `published`, and `active` (which counts towards your license).
Understand Actions
Learn about Actions in GlobalAI. This guide explains what Actions are, how they are used as reusable templates, and lists the available types.