How to Create a Module
Modules are reusable sub-workflows that you can build and use inside your main workflows. They help you save time and keep your automation logic consistent. Instead of building the same set of steps multiple times, you can build them once as a Module and reuse them anywhere.
This guide shows you how to create a new Module to use it in a Workflow.
Create a Module
You build a Module in the same way you build a regular workflow. A Module is defined by its inputs and outputs.
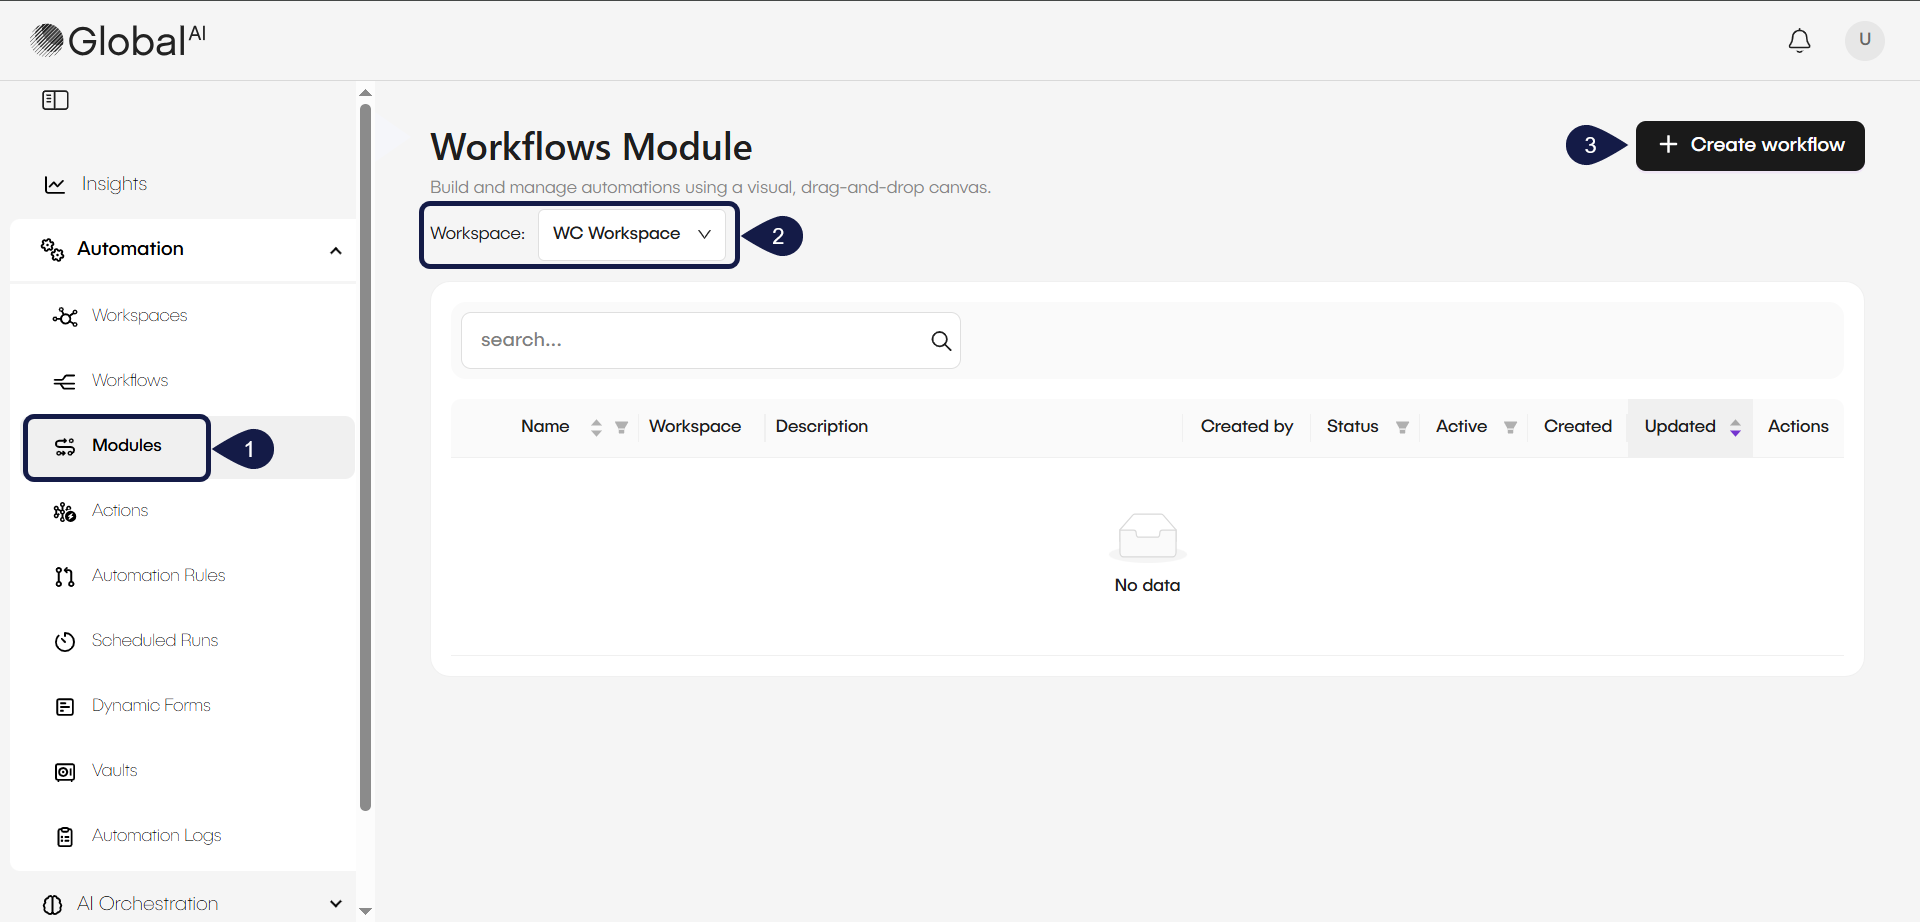
- From the navigation pane, expand Automation and select Modules. This shows the list of all modules for a selected workspace.
- Select the workspace where you want to create your module.
- Click the + Create workflow button to open the editor.
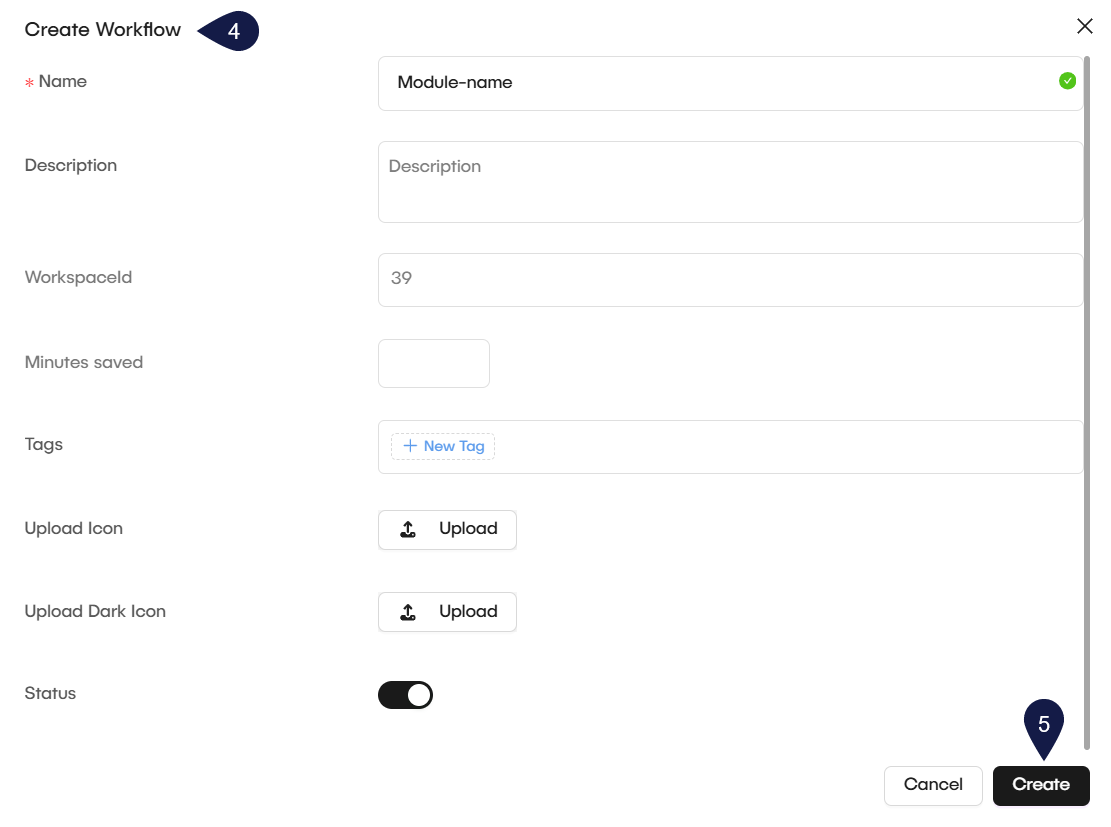
- The Create Workflow modal opens. Fill in the details for your new workflow:
- Name: Enter a unique name for your workflow.
- Description: (Optional) Provide a description for the workflow.
- Workspace ID: This field is automatically populated based on your selected workspace.
- Minutes saved: (Optional) Specify the duration in minutes for which the system should save the workflow's status.
- Tags: (Optional) Add tags to help categorize and identify the workflow.
- Upload Icon: (Optional) Upload an icon to visually represent the workflow.
- Upload Dark Icon: (Optional) Upload a dark mode icon for the workflow.
- Status: Toggle the status to enable or disable the workflow upon creation.
- Click Create.
- The workflow editor will open. You can now add and connect nodes just like a normal workflow.
- To define the Module's inputs, connect your desired inputs to the Start node. Any data connected to the Start node becomes an input field for the Module.
- To define the Module's outputs, connect any data you want the Module to return to the End node.
- Save or Publish your Module.

To learn how to use Modules in your workflows, see the How to Call Modules from Workflows guide.
Related articles
Now that you understand how to configure a module, you can learn about the other components used in automation.
Create a Workflow
Learn how to create your first automation in the visual editor.
Use the Vault
Find out how to securely store and use credentials in your workspace.
How to Call Modules from Workflows
Integrate reusable modules into your GlobalAI workflows to streamline automation and manage complex logic effectively.