How to Configure Dynamic Forms
Dynamic Forms are a feature of the Global AI platform designed to create dynamic pages that enable the collection of user data. Dynamic Forms serve as an interactive interface for users to input data that can subsequently trigger automated workflows. Their design is flexible and adaptable, enabling the creation of forms that can change based on user responses.
Create a Dynamic Form
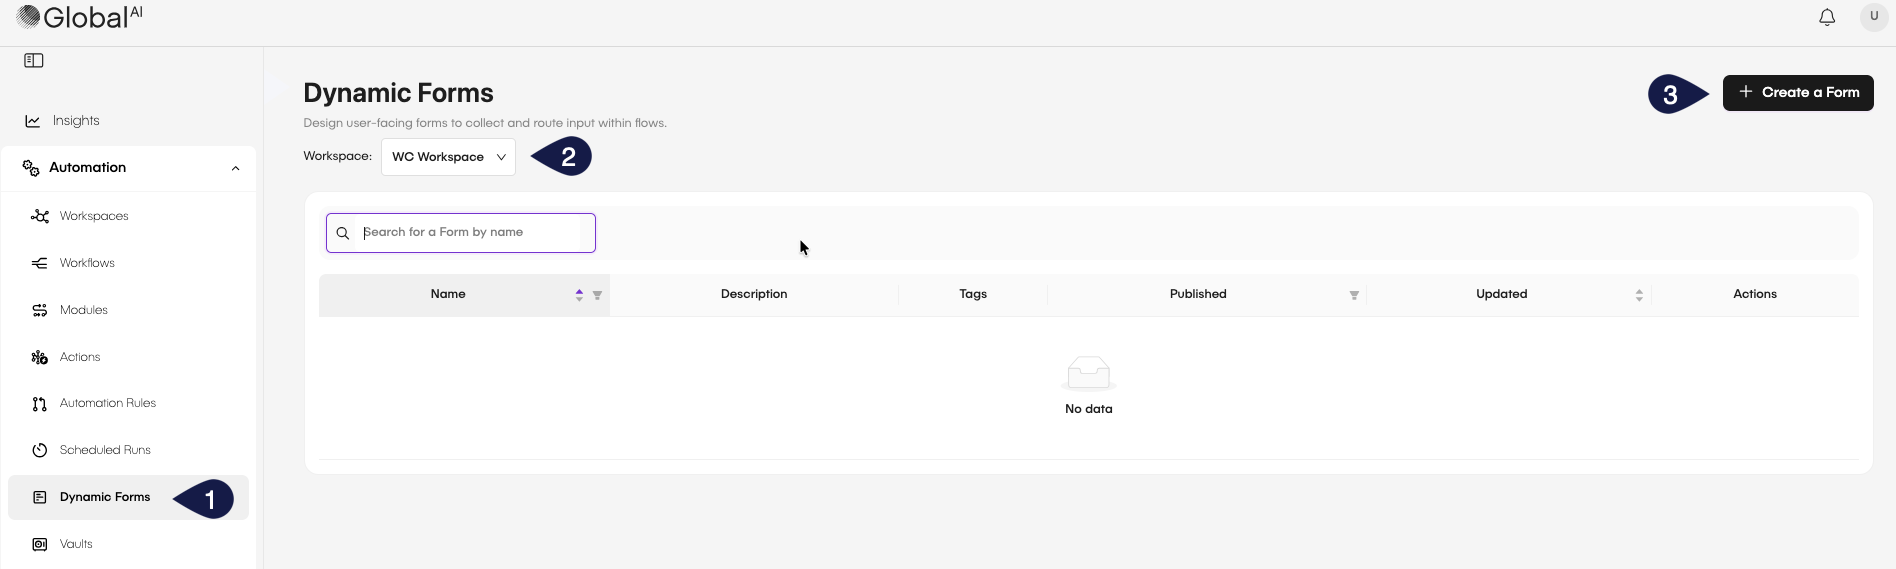
To create a Dynamic Form, follow these steps:
- Access the GlobalAI platform and, on the left sidebar, click on Actions.
- In the Actions section, select Dynamic Forms.
- Click on the Create a Form button.
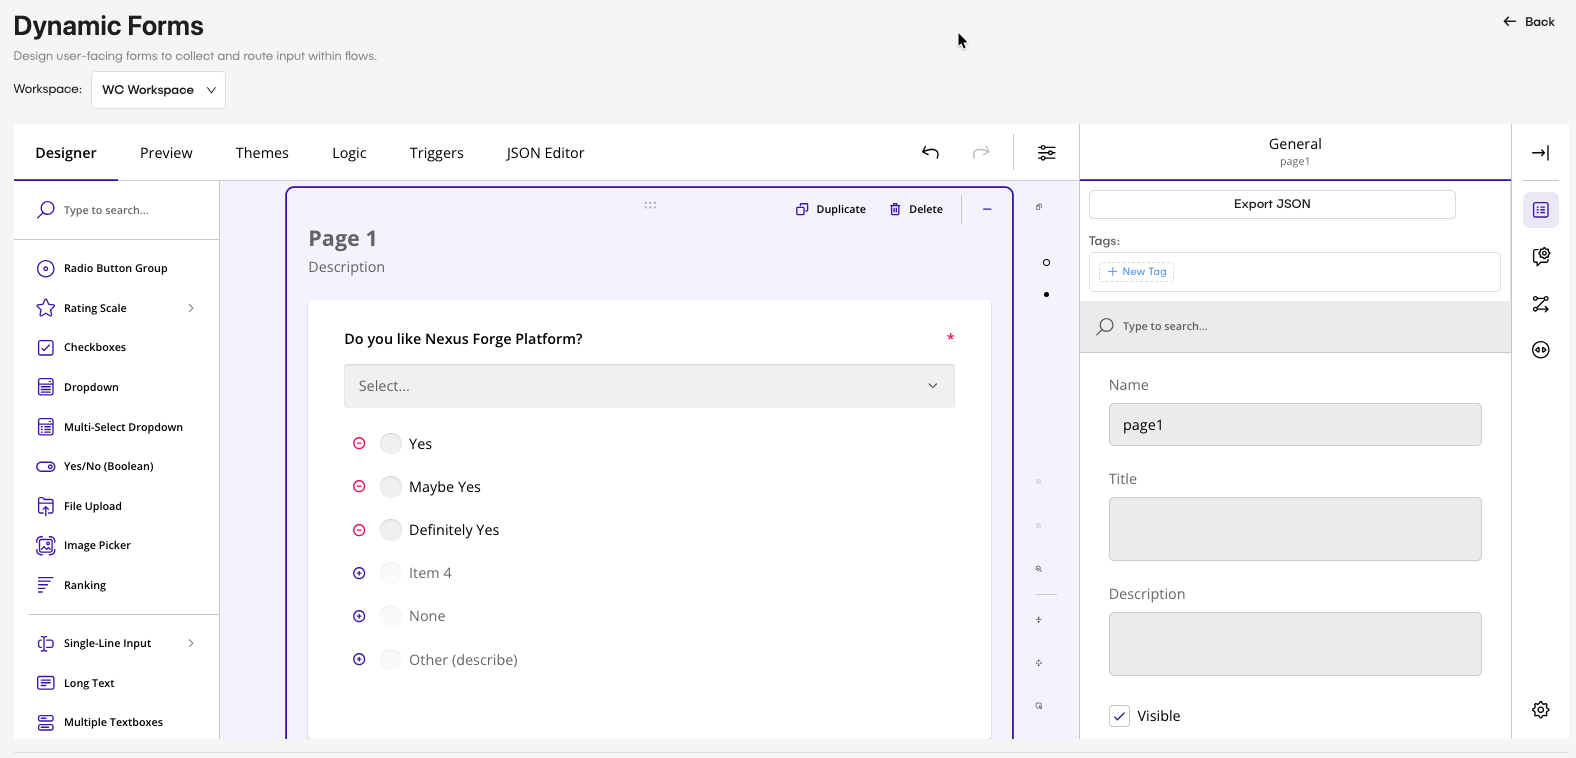
After clicking the button, a form creation interface will appear where you can define the fields and structure of your Dynamic Form. You will be able to add different types of input fields, such as text boxes, dropdowns, checkboxes, and more. You can do everything using the WYSIWYG (What You See Is What You Get) editor.
Dynamic form elements
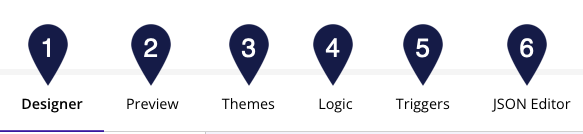
When creating a Dynamic Form, you will have six tabs to edit the behavior and appearance of your form:
- Designer: This tab lets you add and arrange form elements using a drag-and-drop interface. You can select from different input types, such as text fields, dropdowns, checkboxes, and more.
- Preview: This tab provides a live preview of how your form will look and function for end-users. It lets you test the form's interactivity and layout before finalizing it.
- Themes: In this tab, you can customize the visual appearance of your form by selecting from predefined themes or creating your own. You can adjust colors, fonts, and other styling options to match your branding.
- Rules: This tab enables you to set up conditional logic for your form. You can define rules that determine how the form behaves based on user input, such as showing or hiding fields, enabling or disabling buttons, and more.
- Triggers: This tab lets you configure functions or workflows that trigger when a user submits the form.
- JSON Editor: This tab provides access to the underlying JSON code of your form. You can directly edit the code for advanced customization and fine-tuning of your form's behavior and structure.
Dynamic Form logic rules
Dynamic Form logic rules let you create interactive and responsive forms by defining conditions that change the behavior of form elements based on user input. This feature enhances user experience by making forms more intuitive and tailored to individual responses.
To create a rule in a Dynamic Form, follow these steps:
- Open the Dynamic Form editor and navigate to the Logic tab.
- Click on the Add New Rule button to create a new rule.
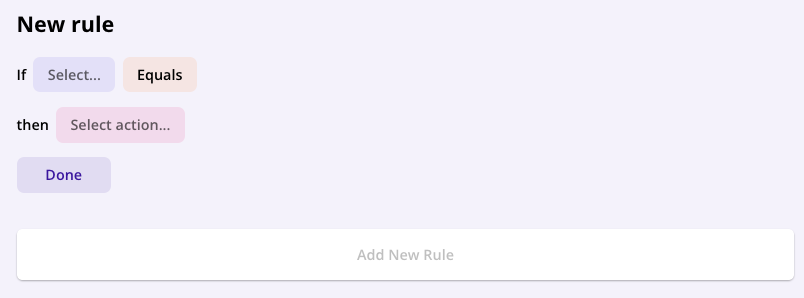
- Define the conditions for the rule by selecting the form elements and specifying the criteria that the rule must meet to trigger. You will create the logic for the form using "If," "And," and "Or" operators to combine many conditions.
For example:
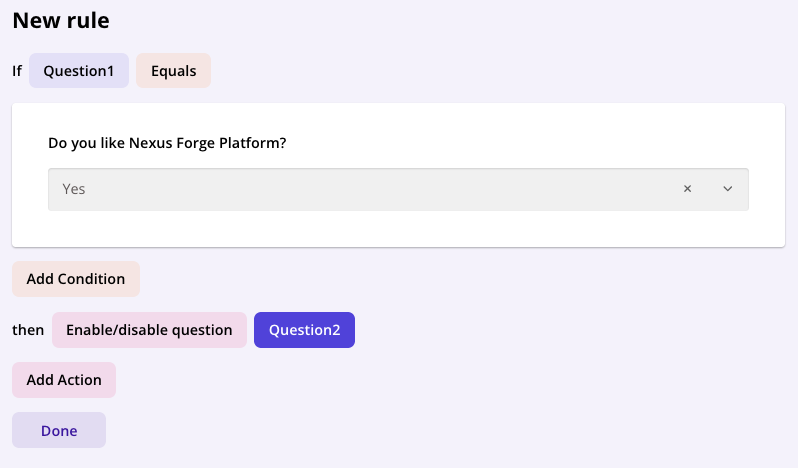
This logic flow indicates that if the user selects "Yes" for the first question, the second question won't be displayed. If the user selects "No" for the first question, the second question will display.
- When you finish the rule configuration, click on the Done button to apply the rule to your Dynamic Form.
You can create many rules within a single Dynamic Form to handle different scenarios and user inputs.
Dynamic Form editor (JSON)
The JSON Editor tab in the Dynamic Form editor provides access to the underlying JSON code that defines the structure and behavior of your form. This feature is useful for advanced users who want to customize their forms beyond what's possible through the visual editor.
The form is shown in a structured JSON format, allowing you to view and edit the form's properties, elements, and logic directly. For example:
{
  "title": "",
  "description": "",
  "pages": [
    {
      "name": "page1",
      "elements": [
        {
          "type": "dropdown",
          "name": "Question1",
          "title": "Do you like Nexus Forge Platform?",
          "isRequired": true,
          "choices": [
            {
              "value": "Item 1",
              "text": "Yes"
            },
            {
              "value": "Item 2",
              "text": "Maybe Yes"
            },
            {
              "value": "Item 3",
              "text": "Definitely Yes"
            }
          ]
        },
        {
          "type": "text",
          "name": "Question2",
          "title": "Question2:",
          "enableIf": "{Question1} = 'Item 1'"
        },
        {
          "type": "radiogroup",
          "name": "question5",
          "choices": [
            "Item 1",
            "Item 2",
            "Item 3"
          ]
        }
      ]
    },
    {
      "name": "page2",
      "elements": [
        {
          "type": "dropdown",
          "name": "question3",
          "title": "Do you like Nexus Forge Platform?",
          "isRequired": true,
          "choices": [
            {
              "value": "Item 1",
              "text": "Yes"
            },
            {
              "value": "Item 2",
              "text": "Maybe Yes"
            },
            {
              "value": "Item 3",
              "text": "Definitely Yes"
            }
          ]
        },
        {
          "type": "text",
          "name": "question4",
          "title": "Question2:"
        }
      ]
    }
  ],
  "widthMode": "responsive"
}
You can directly edit the JSON code to modify your form's elements, properties, and logic. After making changes, it's recommended to validate the JSON to ensure there are no syntax errors before saving your form. The editor also allows you to export your Dynamic Form as a JSON file, copy the JSON code to your clipboard, or import a saved JSON file using the respective Export, Copy to Clipboard, and Import buttons.
Save and publish the Dynamic Form
Once you have finished creating and customizing your Dynamic Form, save and publish it to make it available for use. You have three options on your form:
- Click on the Save button to save your form and continue editing later if needed.
- Click on the Save and Close button to save your form and close it.
- Click on the Publish button to make your form live and accessible to users.