How to Create and Manage a Workspace
A Workspace is a container used to organize all the components for a specific project or team. It helps you manage workflows, modules, actions, and forms in one place. Using Workspaces is an effective way to control access to your automations and keep your work organized.
This guide explains how to create a new Workspace, add members, and manage permissions.
Create a Workspace
You can create a new Workspace directly from the Automation menu.
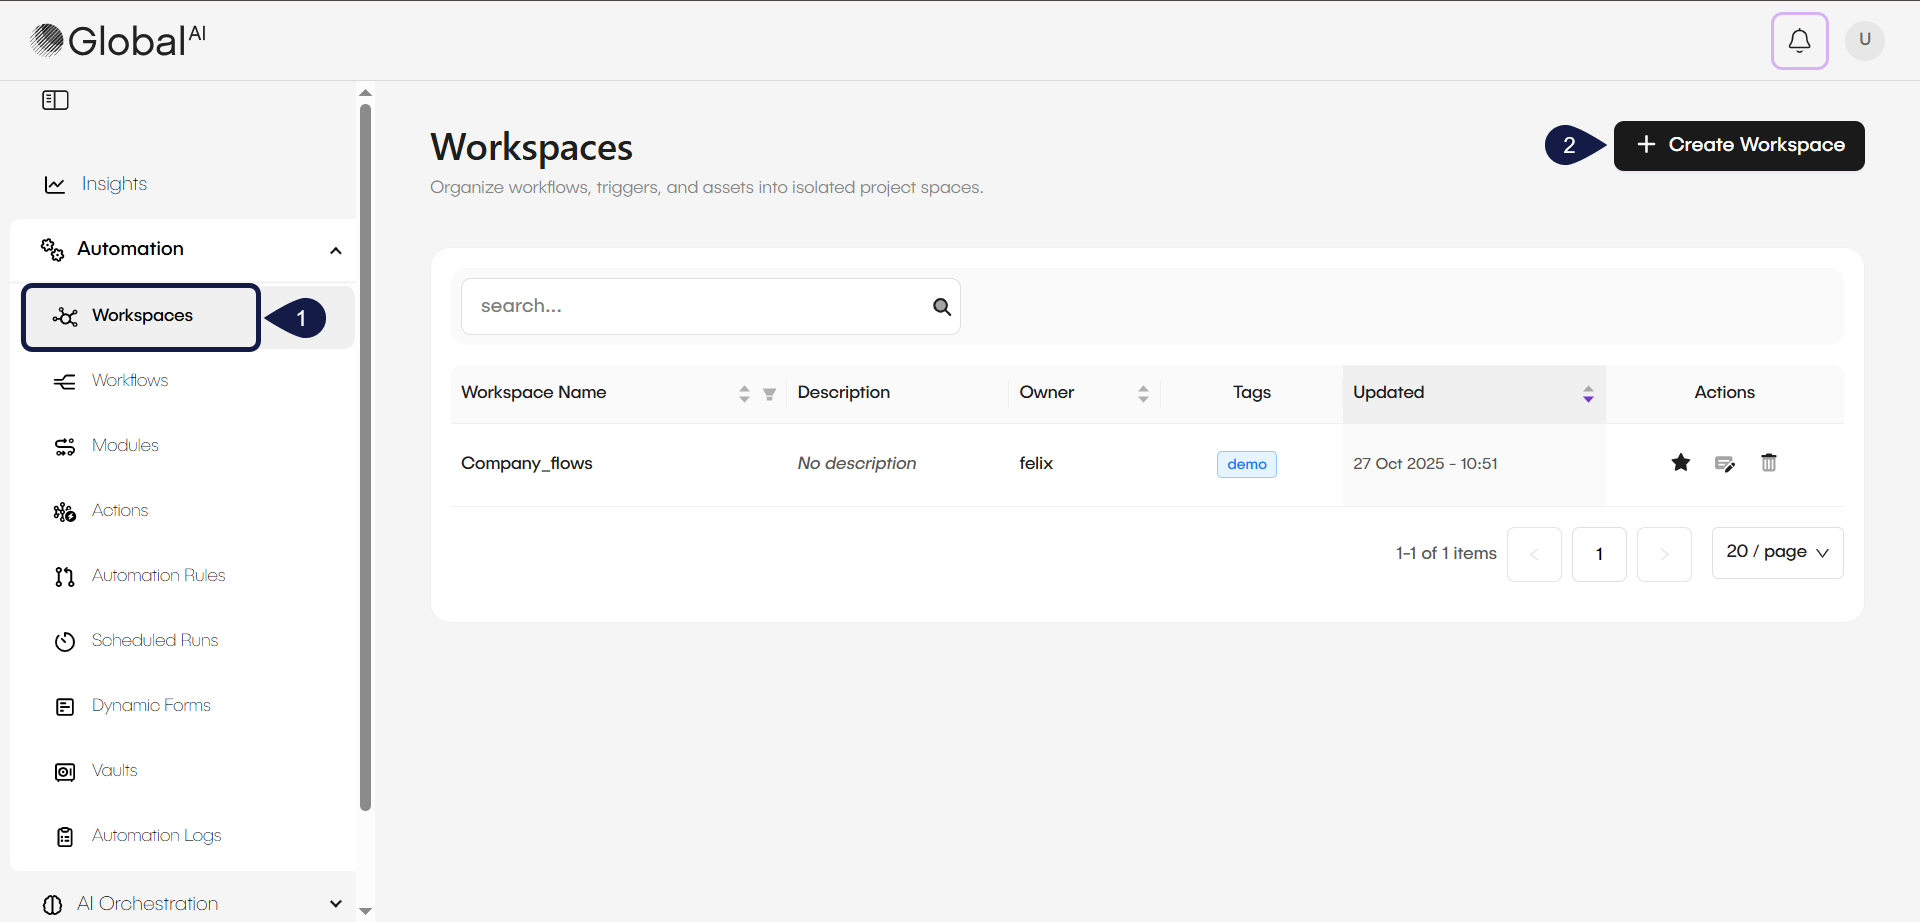
- From the main navigation, select Automation and then Workspaces.
- Click the + Create Workspace button to open the configuration menu.
- Enter a Name and a Description for your Workspace. This helps other users understand its purpose.
- You can also add Tags to the Workspace. These tags are used for display and organization purposes only.
- Click Create to save your new Workspace.

Manage Workspace permissions
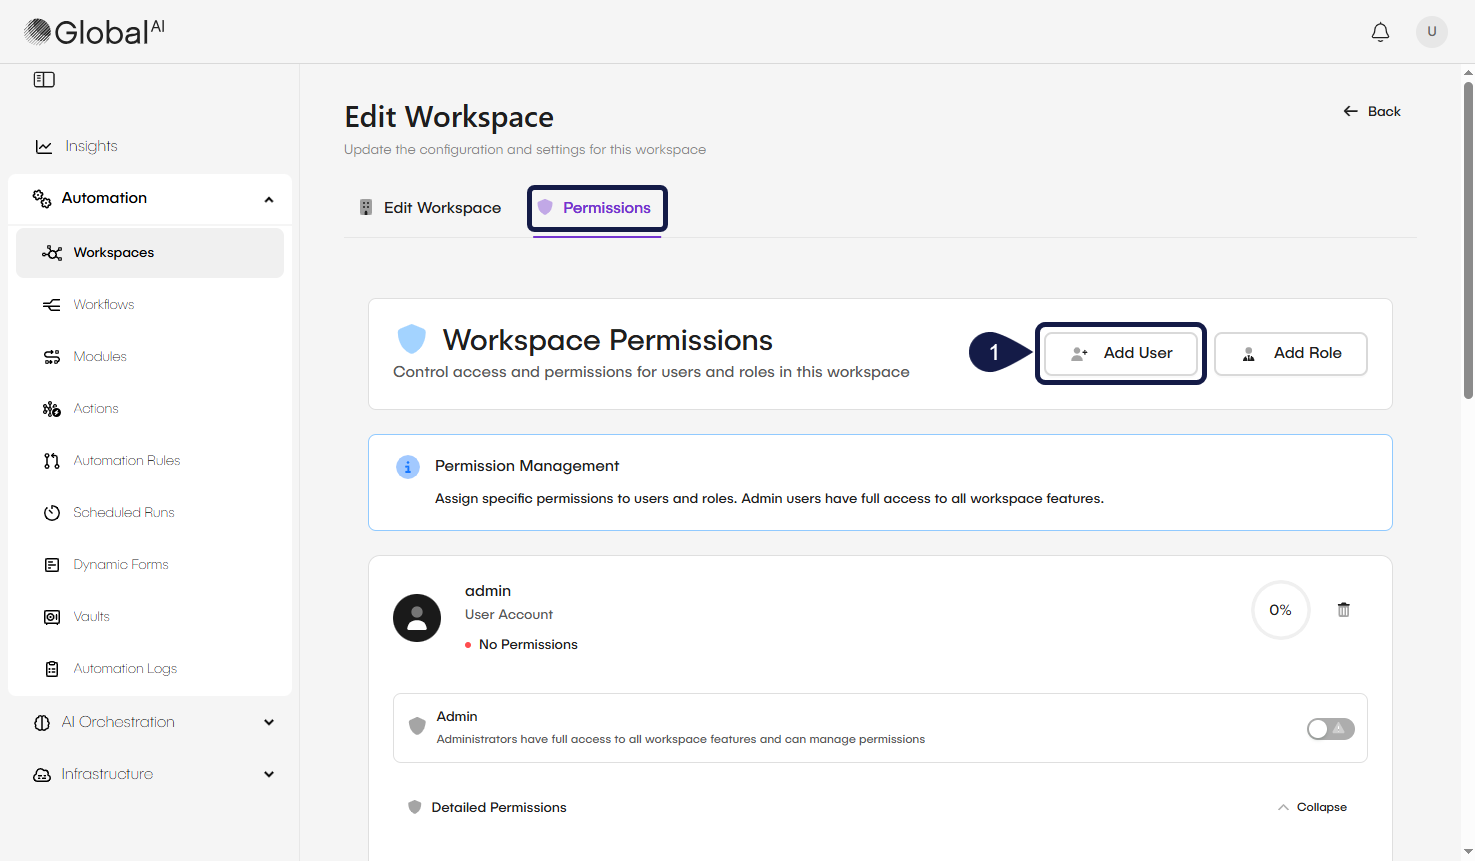
In the Permissions tab, you can control who can access a Workspace and what these users or roles can do.
By default, administrators can see all Workspaces in the platform, have full access to all Workspace features, and can manage permissions. Standard users can only see the Workspaces they have been invited to.
Add a member or role
You can add members to a Workspace in two ways: by adding specific users or by adding a role. A role is a group of users that share the same set of permissions.
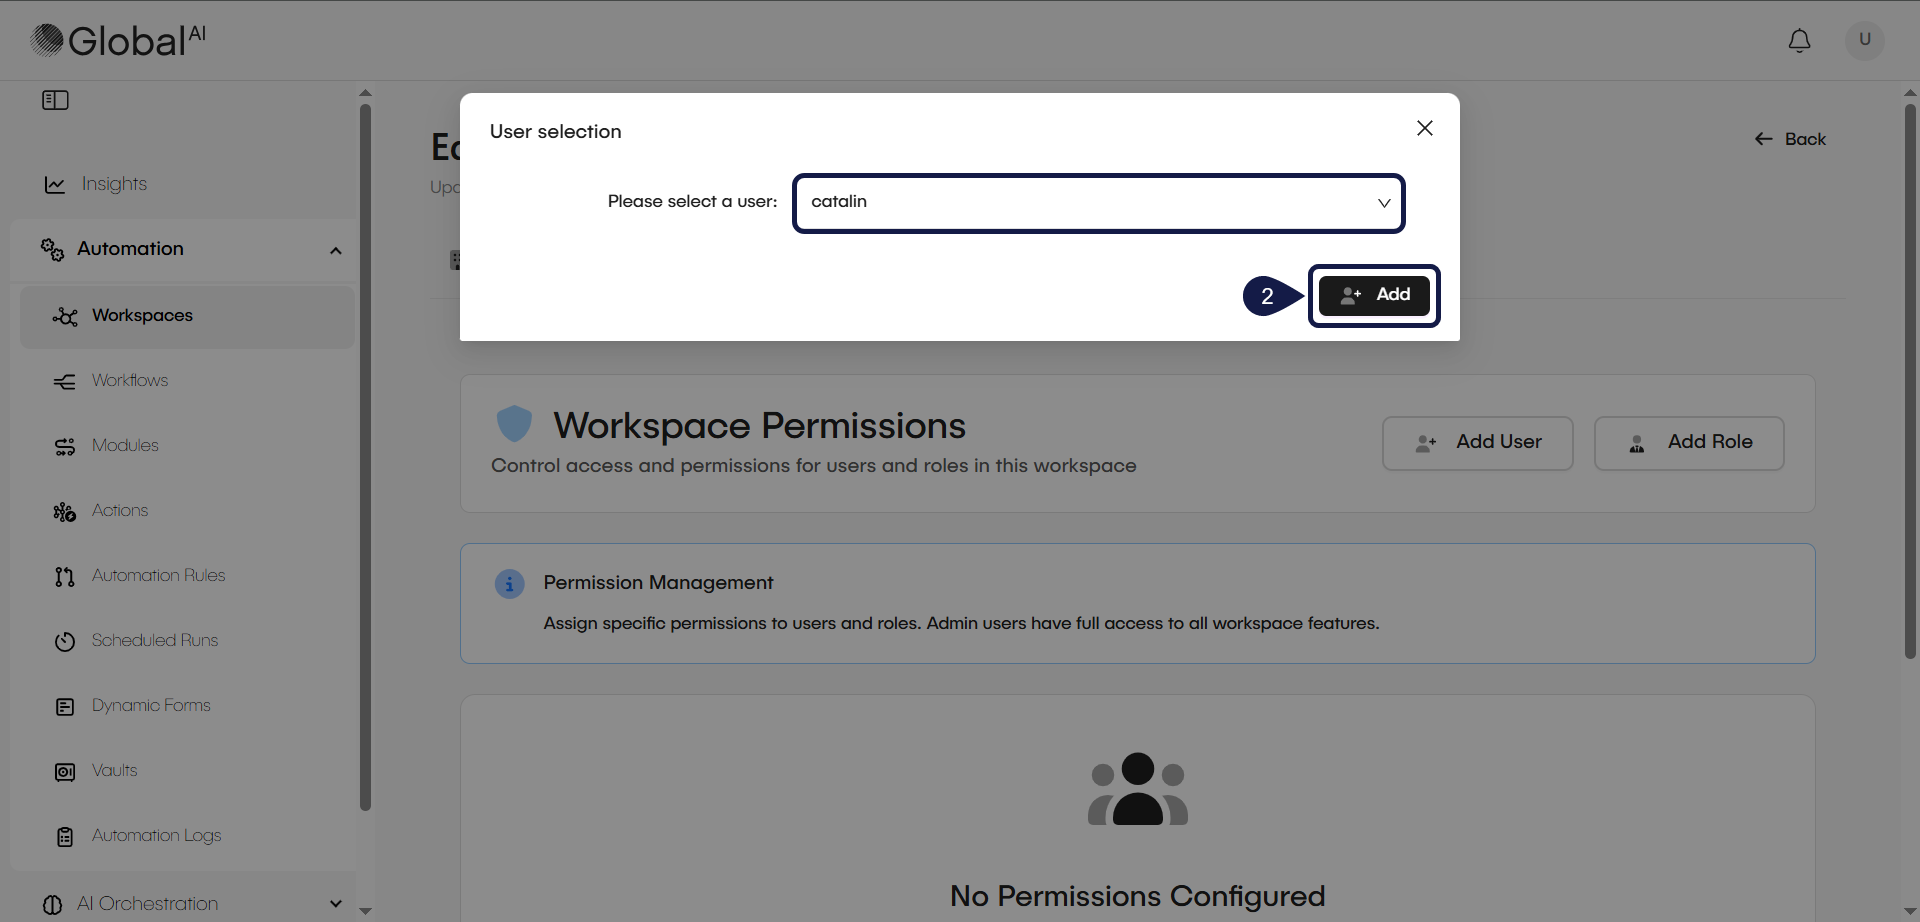
- Access a workspace and from the Permissions tab, select Add User or Add role.
- Select the user or role from the dropdown menu and click Add. The new entry now appears in the permissions list, allowing you to set the correct permissions.
Control component access
After you add a user or role, you can set granular permissions for specific components within that Workspace. This allows you to define exactly what they can view, edit, or execute.
You can set permissions for the following components:
- Cronjob (Scheduled runs)
- Source (Automation rules)
- Trigger (Trigger workflows)
- Workflow (Workflows within the workspace)
- Vault (The secure storage for secrets)
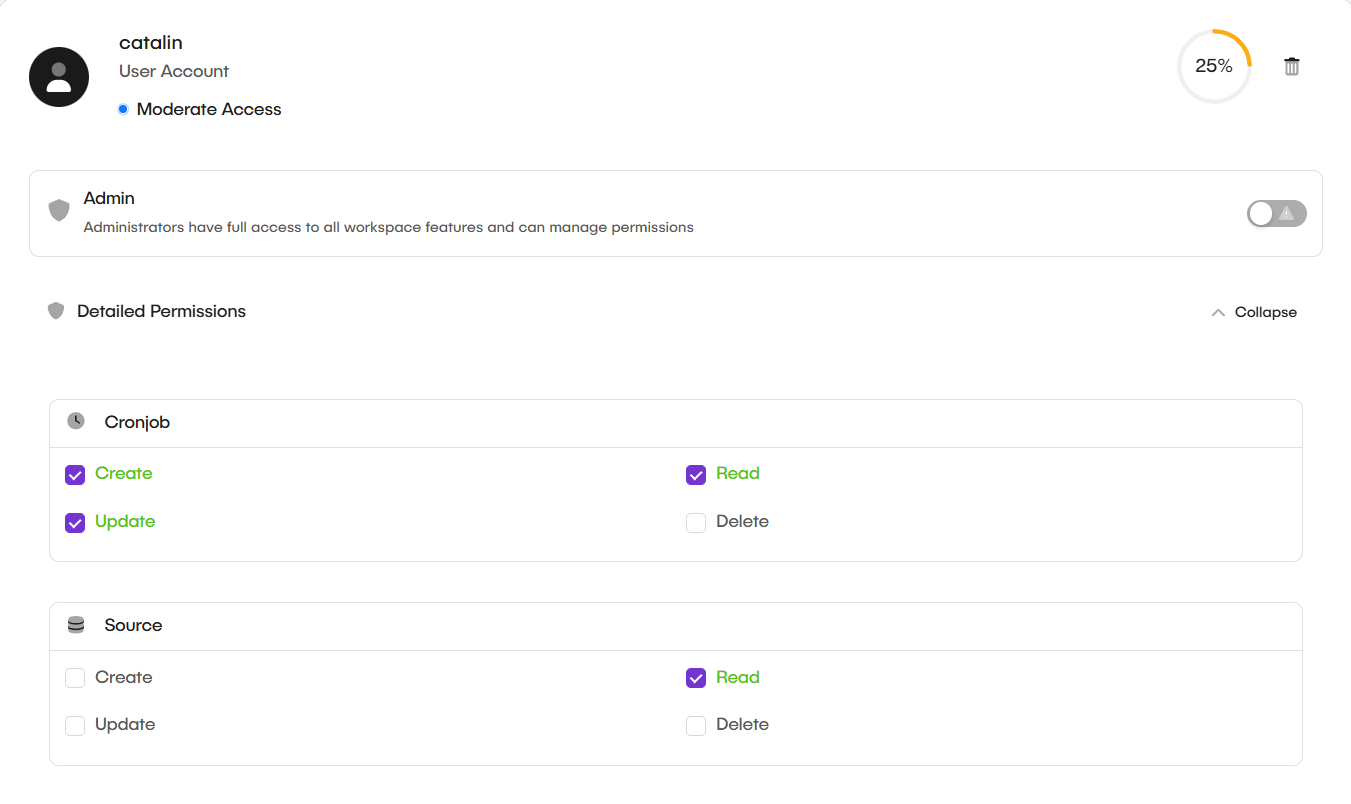
For a fast way to grant full permissions, you can use the Admin Access toggle. This gives the selected user or role complete administrator access to all components within this specific Workspace.

Related articles
Now that you have set up your Workspace, you are ready to start building automations.
Create your First Workflow
Follow a step-by-step tutorial to build and run a simple "Hello World" workflow.
Nodes Concept
Understand the concept of Nodes, which are the fundamental building blocks for creating automations.
Use Variables
Learn how to store, transform, and pass data between nodes in your workflow.