How to Create an AI Agent
When using the GlobalAI platform, you can create AI Agents to automate tasks, improve efficiency, and reduce costs.
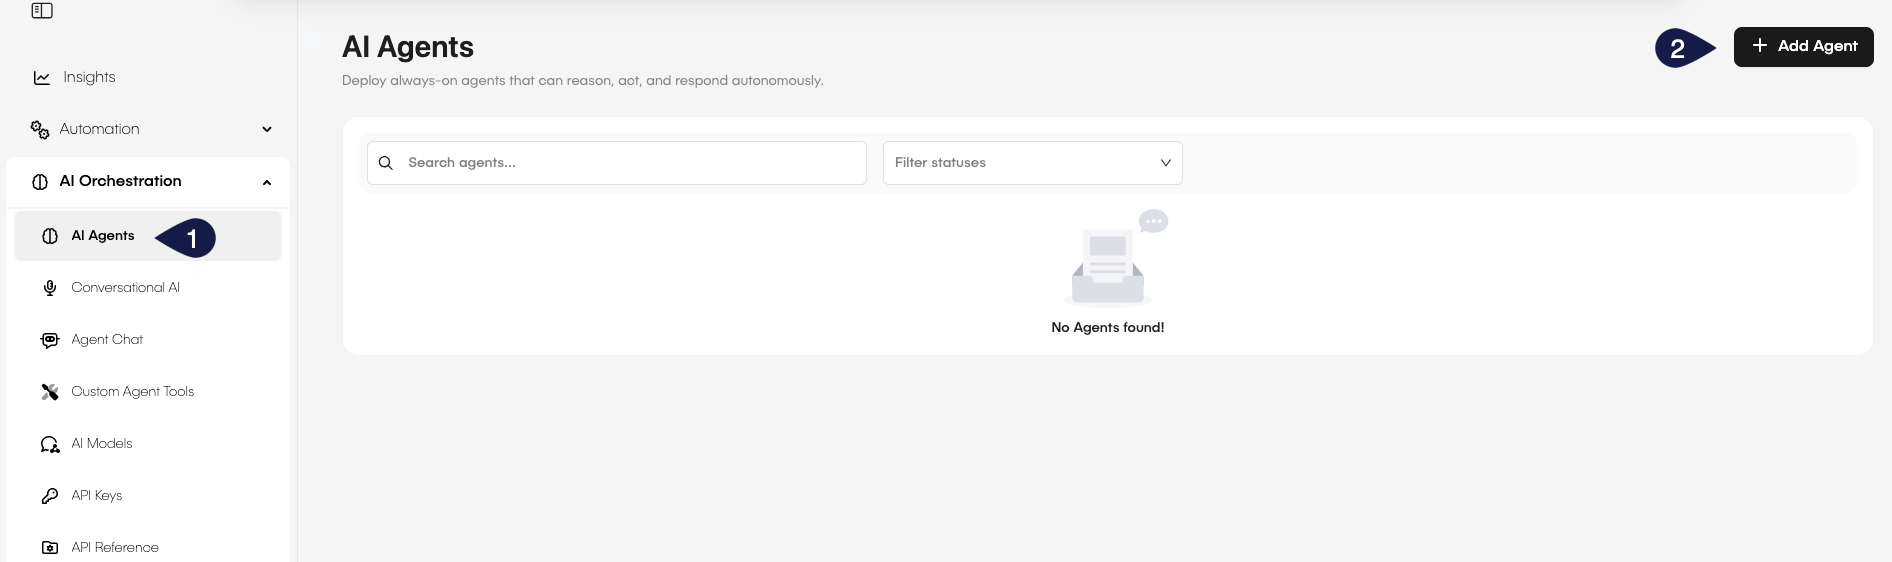
Add a new AI Agent
To add a new AI Agent, follow these steps:
- On the GlobalAI dashboard, access the AI Orchestration > AI Agent on the sidebar.
- On the AI Agent page, click on the + Add Agent button.
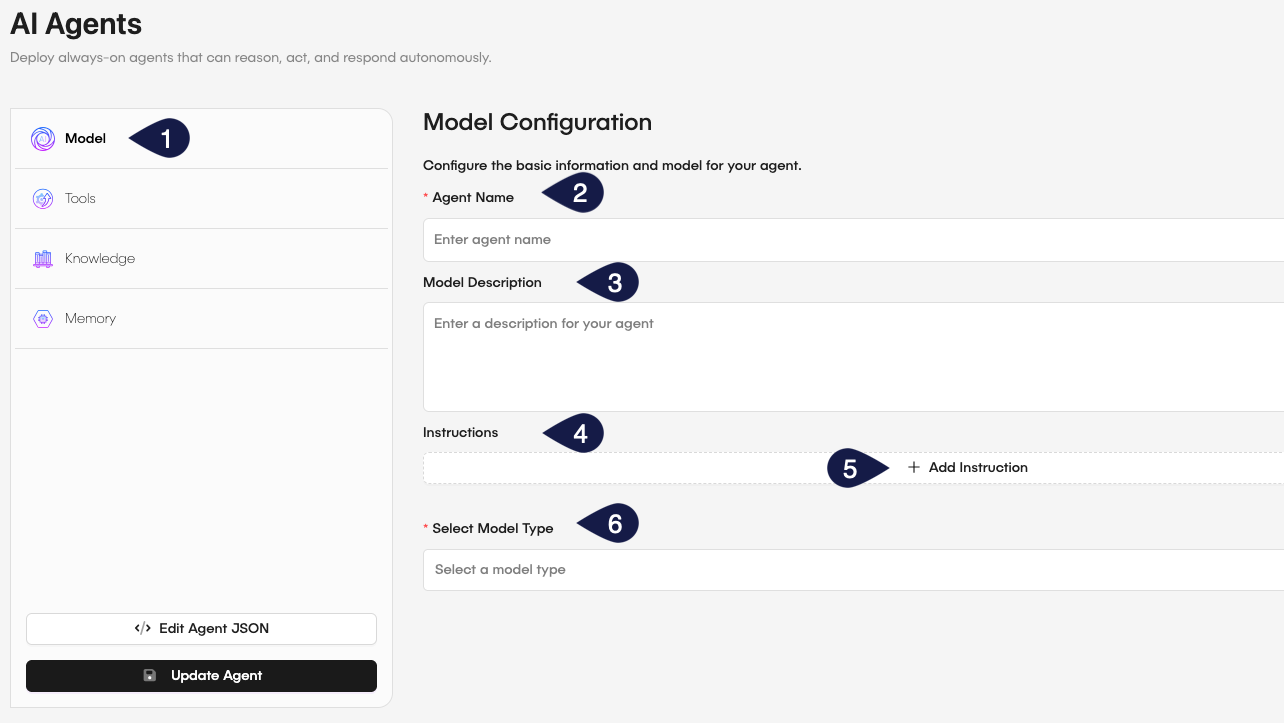
- On the sidebar of the AI Agents form, select the Model Configuration tab.
- On the Model Configuration form, fill in the details of the AI Agent you want to create:
- Agent Name: Enter a name for your AI Agent.
- Model Description: Provide a brief description of the AI Agent's model and purpose.
- Instructions: Set the instructions for the AI Agent. You can add as many instruction as you want by clicking the +Add Instruction button.
- Select Model Type: From the dropdown menu, select the AI Model you want to use.
- Every model will have its own set of parameters that you will have to configure.
- For each parameter, you will have to provide a value, like API Key, API version, etc.
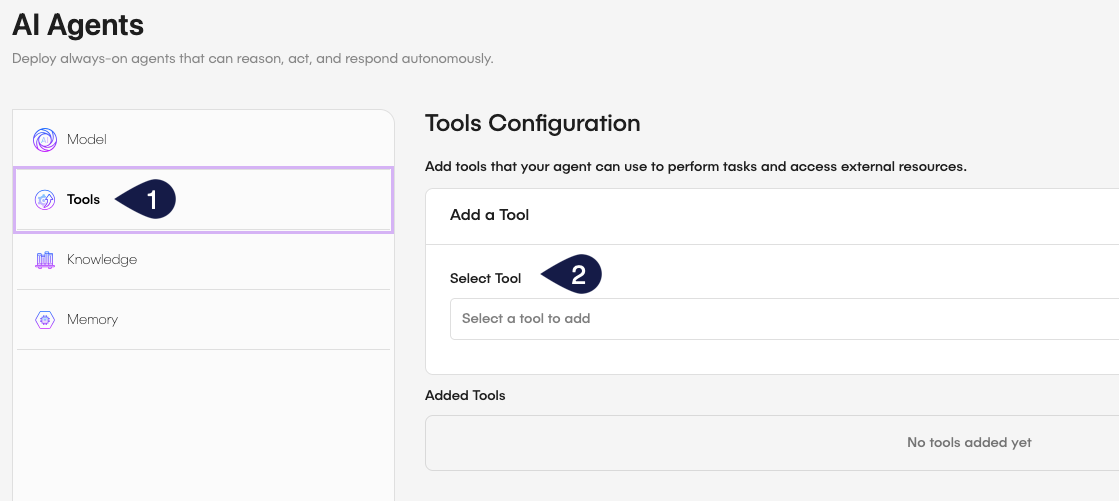
- On the sidebar, select the Tools tab.
- On the Tools form, select from the dropdown menu the tools you want to use with your AI Agent.
- You can add as many tools as your want.
- For every tool you will have to provide a set of parameters that will vary according to the tool's requirements.
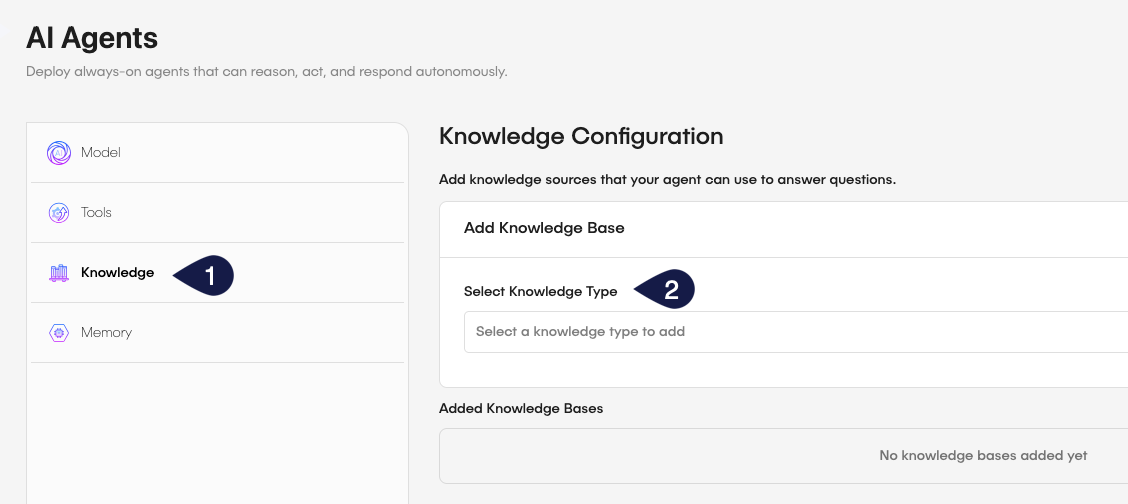
- On the sidebar, select the Knowledge tab.
- On the Knowledge Configuration form, select from the dropdown menu the knowledge sources you want to use with your AI Agent.
- You can add as many knowledge sources as your want.
- For every knowledge source you will have to provide a set of parameters that will vary according to the knowledge source's requirements.
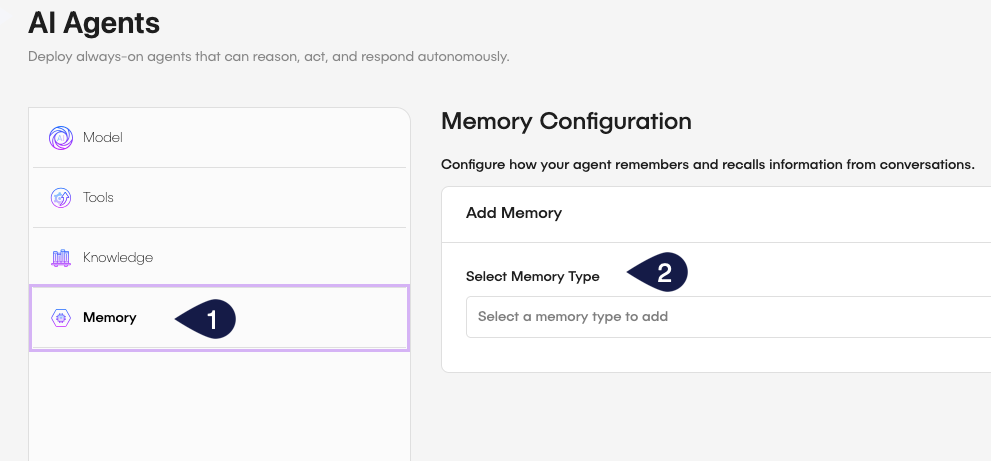
- On the sidebar, select Memory tab.
- On the Memory Configuration form, select from the dropdown menu the memory sources you want to use with your AI Agent.
- You can add as many memory sources as your want.
- For every memory source you will have to provide a set of parameters that will vary according to the memory source's requirements.
On GlobalAI, an Agent's memory provides context. When configured, you can store and retrieve information from it.
- Click Update Agent to save the configuration.
Edit Agent JSON
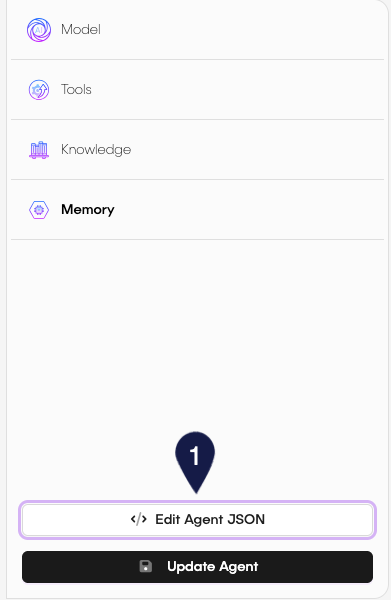
If you want, you can use the json editor to edit the Agent's configuration. This gives you a more detailed view of the Agent's configuration and lets you change the configuration directly. To access the json editor, click the Edit Agent json button on the sidebar of the Agent's configuration page.
This will open the json editor.

The json editor has three modes:
- text: Use this mode to edit the
jsoncode directly. - tree: Use this mode to edit the
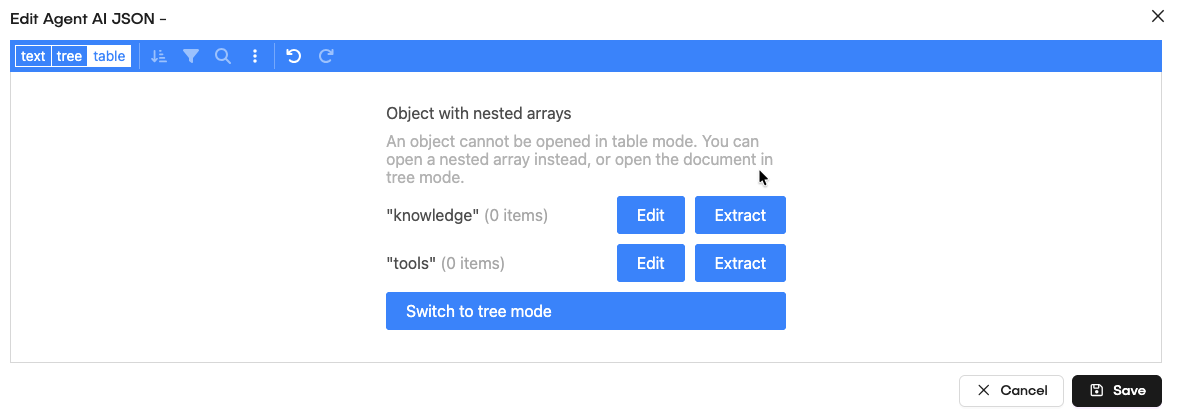
jsoncode in a tree view. - table: Use this mode to edit the
jsoncode in a table view.
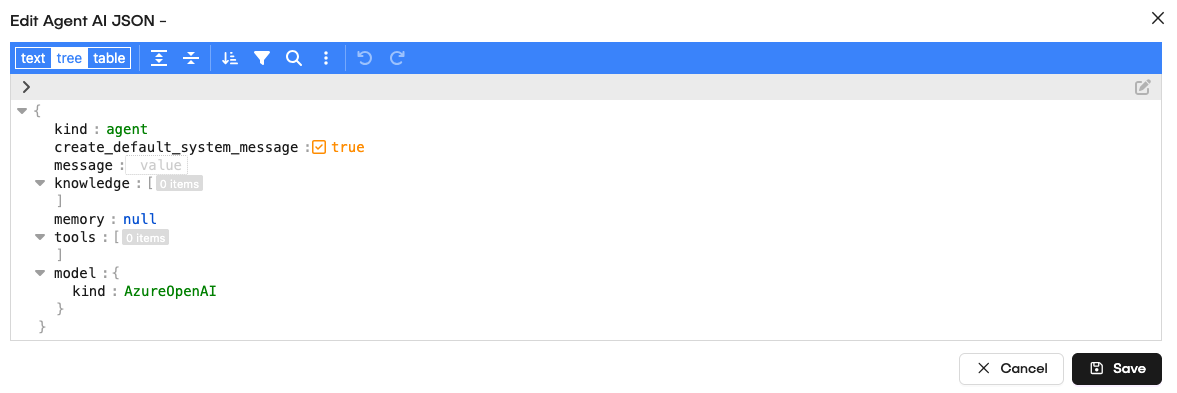
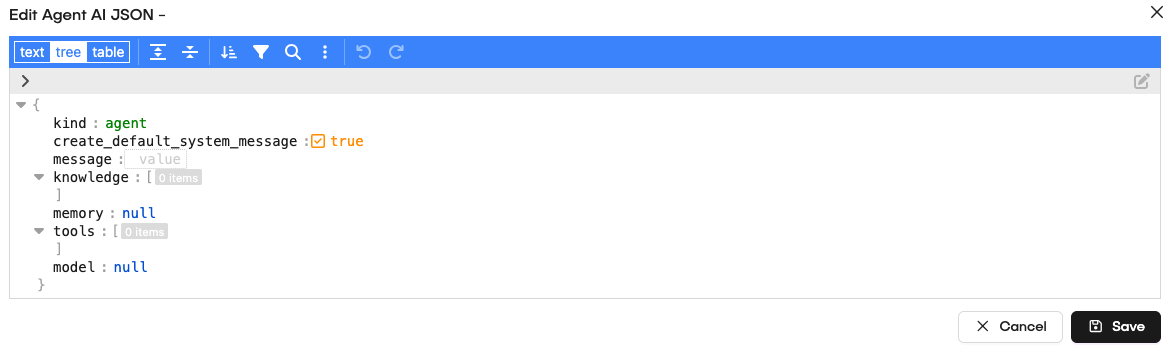
In text mode, edit the JSON directly:
Example configuration:
{
  "kind": "personal-digital-assistant",
  "create_default_system_message": true,
  "message": "",
  "knowledge": [],
  "memory": null,
  "tools": [],
  "model": {
    "kind": "AzureOpenAI"
  }
}
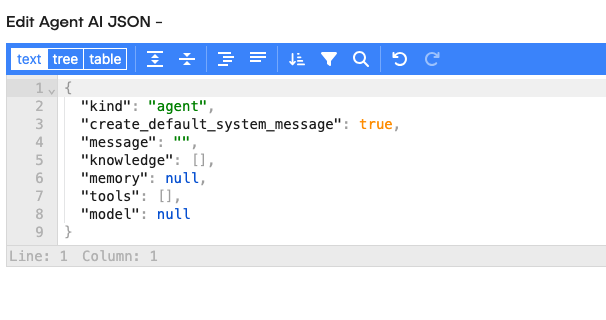
For the tree mode, you will edit using the json file with a tree visualization:
In table mode, edit the JSON structure using tables:
When you finish editing the JSON code, you can save it by clicking the Save button in the JSON editor.
Publish your AI Agent
After creating your AI Agent, you can publish it to make it available for use in your workflows. To publish your AI Agent, follow these steps:
- On the GlobalAI dashboard, access the AI Orchestration > AI Agents on the sidebar.
- On the Search agents bar, search for your AI Agent by its name.
- You can filter the results by selecting, from the dropdown menu, one of the available filters: Not deployed, Failed, Partly Available, or Available.
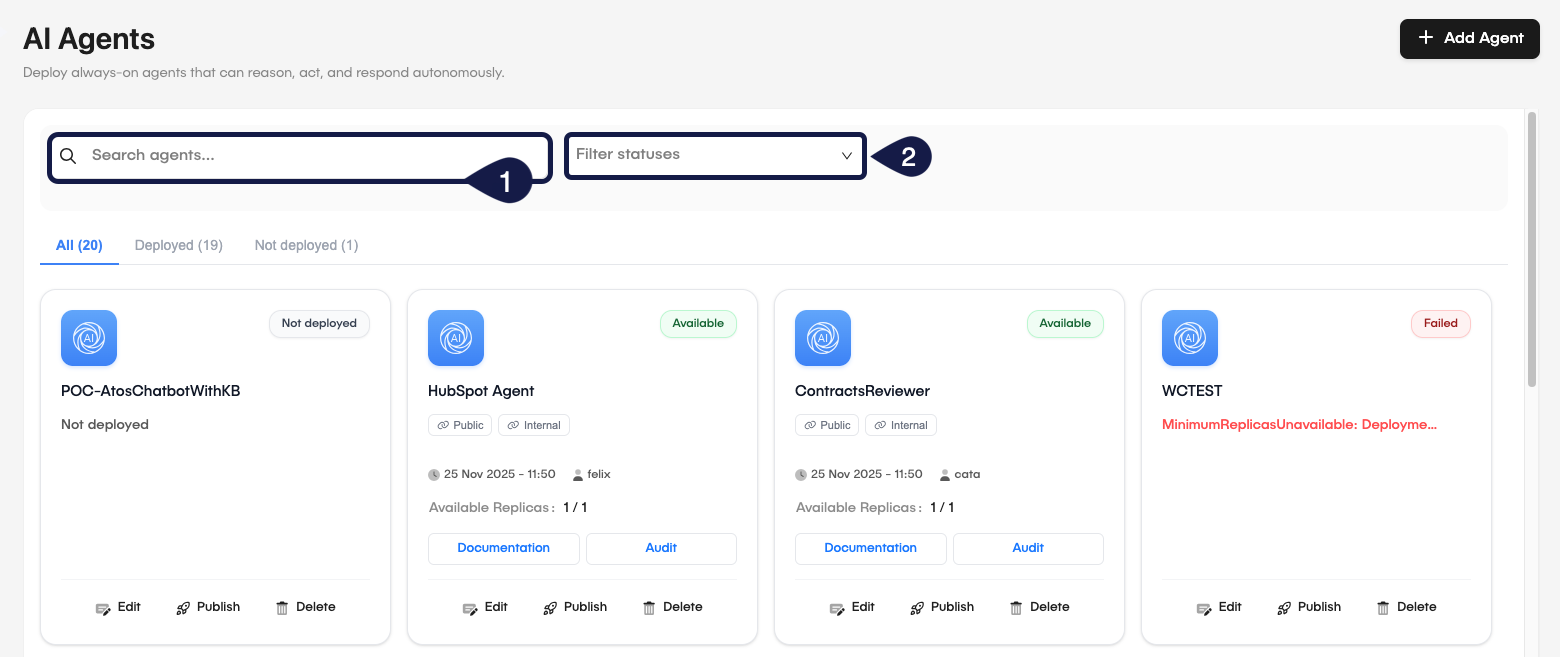
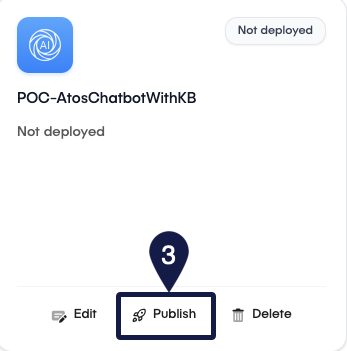
- On the AI Agents list, locate your AI Agent and click the Publish button.
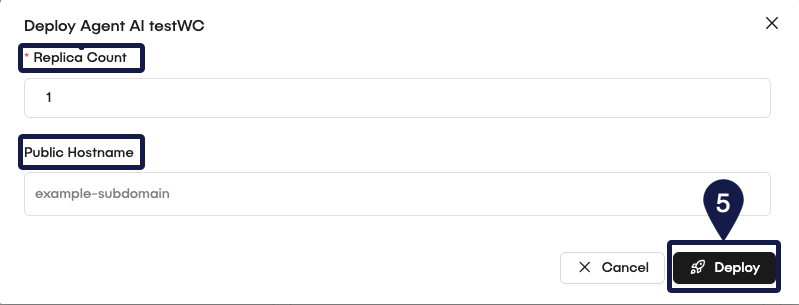
- By clicking the Publish button, the system will open the Deploy Agent modal with the parameters:
- Replica count: Set the number of replicas for the AI Agent. This determines how many instances of the agent will run concurrently to handle requests.
- Public Hostname: the public hostname for the AI Agent.
- After configuring the parameters, click the Publish button to start the deployment process.
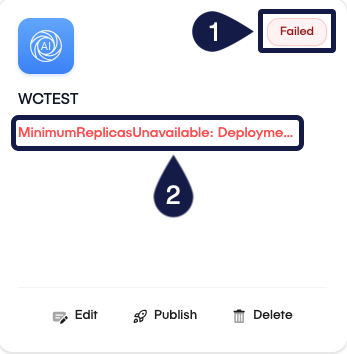
If your publish fails, it will shown a red message in the body of the AI Agent card witht the mains reason (1). By hovering this message, you will see more details about the error. Also, GlobalAI flags your AI Agent as Failed in the status badge (2).
Audit AI Agent sessions
You can audit the sessions of your AI Agents to track their performance and interactions. To review AI Agent sessions, follow these steps:
- On the GlobalAI dashboard, access the AI Orchestration > AI Agents on the sidebar.
- On the AI Agents list, locate your AI Agent and click the Audit Sessions button on the specific agent card.
- This opens the Audit Sessions page, where you can view detailed logs and metrics of the AI Agent Audit Sessions and review the interactions and performance of your AI Agent over time.
- The report for the AI Agent sessions includes:
- Session ID: Unique identifier for each session.
- Title: The title of the session.
- Session Name: The name of the session.
- Created at: Timestamp that shows when you created the session.
- Actions: Click to open the Session details modal with more information about the session, such as Memory & Execution, Agent Configuration, and Performance Metrics about tokens and total time.
Actions with AI agents
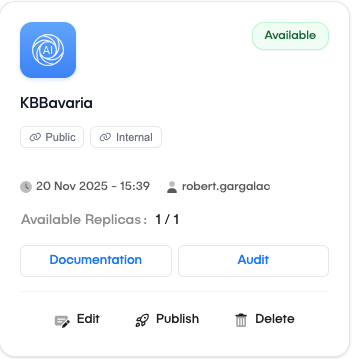
On the AI Agents card, you will find other actions you can perform with your AI Agents:
- Copy the internal link for the AI Agent.
- Copy the external link for the AI Agent.
- Information that shows when you created the AI Agent and when you last updated it.
- Documentation link to the AI Agents documentation.
- Link the Audit sessions with the AI Agent.
- Edit the AI Agent configuration.
- Publish the AI Agent.
- Delete the AI Agent.
Related articles
Now that you know how to create an AI Agent, you might want to learn more about: